
I have decided to create this as a multi part post to hopefully make it easier to understand.
- Part 1 – A high level overview
- Part 2 – Core Component creation
- Part 3 – The Session Host creation
- Part 4 – Completing the setup
- Part 6 – Securing Access
- Part 5 – Logging on to AVD
Introduction
So Following on from my last post I thought I’d share how I actually went about deploying my AVD environment as a PAW. This post is a high level overview of what I have done. The next set of posts will detail each section in a bit more detail and why I did it that way.
I also thought I’d take this as an opportunity to try and automate it as best I can. This lead me down the path of learning some Bicep. This is all new to me! But here are two Bicep scripts that I have created to create the initial AVD infrastructure for creating a vPAW or cPAW depending on what you want to call it.
A small disclaimer here, I am by no means a Bicep expert so there may be an easier way to do this, or even a different way. You might even be able to do it all in the one script, but at the moment this is where I am with my setup.
The scripts I have will deploy AVD Session Hosts joined to Entra ID and enrolled in Intune. I will upload and share on my GitHub
Part 2 will cover off the
Whats needed
To create the cPAW (Cloud Privileged Access Workstation) I needed the following:
-
An Azure Subscription
-
A Resource Group
-
A Hostpool
-
A Workspace
-
An Application Group
-
A Virtual Network and Subnet
-
At least one Session Host (I opted for 2)
-
3 Entra Groups
-
_User-cPAW-Users – This is a user assigned group
-
_User-cPAW-Admins- This is a user assigned group
-
_Device-cPAW – This is a dynamic device group
-
A public location to host some PowerShell scripts (I used GitHub).
-
Entra Tenant
-
Intune
Creating the Initial AVD Environment
So in order to be able to connect to a Session Host you need the initial environment setup this is the Hostpool, the Workspace and the Application Group.
This is where my first Bicep script comes in to play:
`paramlocationstring='uksouth'paramsessionHostPrefixstring='cPAW'//Deploy the HostpoolresourceHostPool'Microsoft.DesktopVirtualization/hostPools@2021-07-12'= {name:'${sessionHostPrefix}-HostPool'location:locationproperties: {friendlyName:'${sessionHostPrefix}Host Pool'description:'${sessionHostPrefix}Virual Privileged Access Workstaiotn Host Pool for privielged users to securely access the Microsoft Admin centers from'hostPoolType:'Pooled'loadBalancerType:'BreadthFirst'maxSessionLimit:5personalDesktopAssignmentType:'Automatic'startVMOnConnect:truepreferredAppGroupType:'Desktop'customRdpProperty:'enablecredsspsupport:i:0;authentication level:i:2;enablerdsaadauth:i:1;'}}//Deploy the vPAW Desktop Application GroupresourceAppGroup'Microsoft.DesktopVirtualization/applicationGroups@2021-07-12'= {name:'${sessionHostPrefix}-AppGroup'location:locationproperties: {description:'${sessionHostPrefix}Application Group'friendlyName:'${sessionHostPrefix}Desktop Application Group'hostPoolArmPath:HostPool.idapplicationGroupType:'Desktop'}}//Deploy the vPAW WorkspaceresourceWorkspace'Microsoft.DesktopVirtualization/workspaces@2021-07-12'= {name:'${sessionHostPrefix}-Workspace'location:locationproperties: {description:'${sessionHostPrefix}Workspace for Privileged Users'friendlyName:'${sessionHostPrefix}Workspace'applicationGroupReferences: [AppGroup.id]}}`
This script will create the initial infrastructure for AVD. There are multiple ways to deploy this but for me, I decided to do it in the Azure Portal itself.
To deploy in the Azure Portal you need to convert the Bicep script in to an ARM Template, in Visual Studio Code that’s simple enough. You can do that by right clicking on the script and then selectBuild ARM Template:
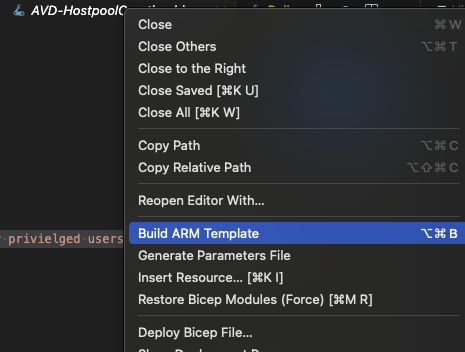
Once you have created the ARM Template click on the created file in the Visual Studio Code Output pane to open it:

You’ll then have something that looks like this:
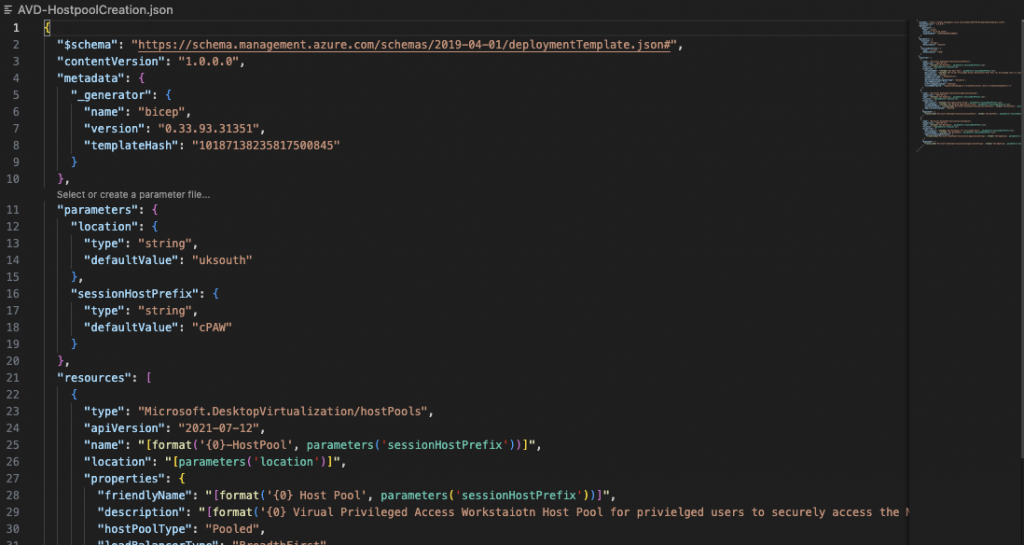
Select all and copy it to the clipboard. Then go to the Azure Portal and then search forDeploy a custom template:
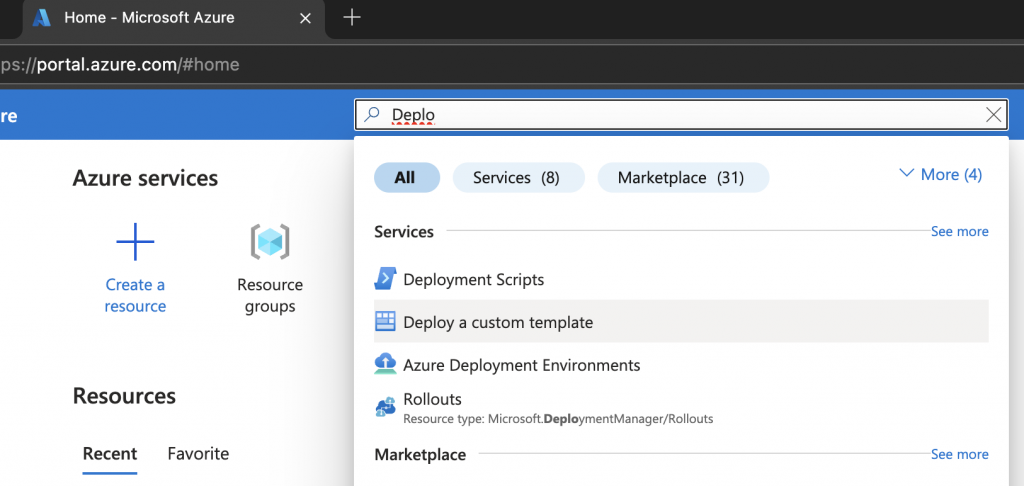
Then selectBuild your own template in the editor:
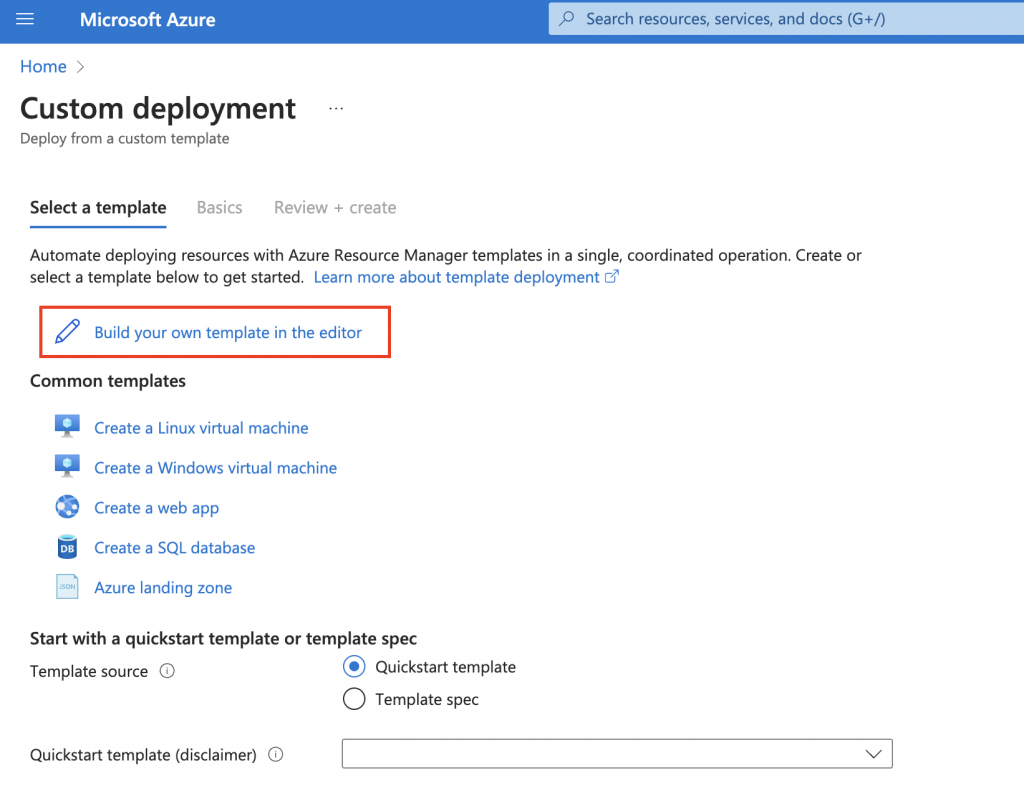
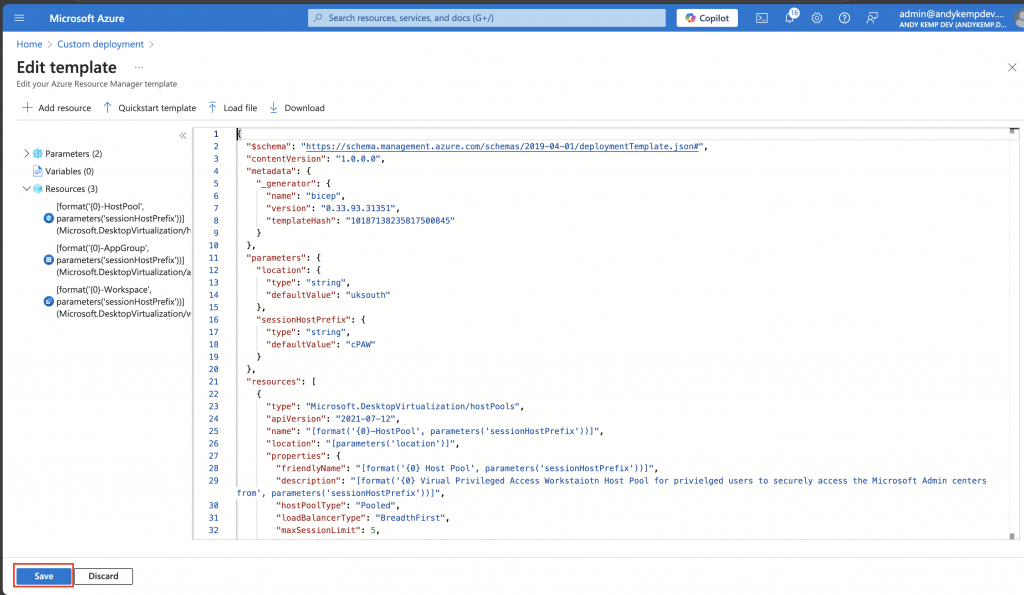
Paste your ARM Template in to the template editor over writing any existing code in there and then clickSave:
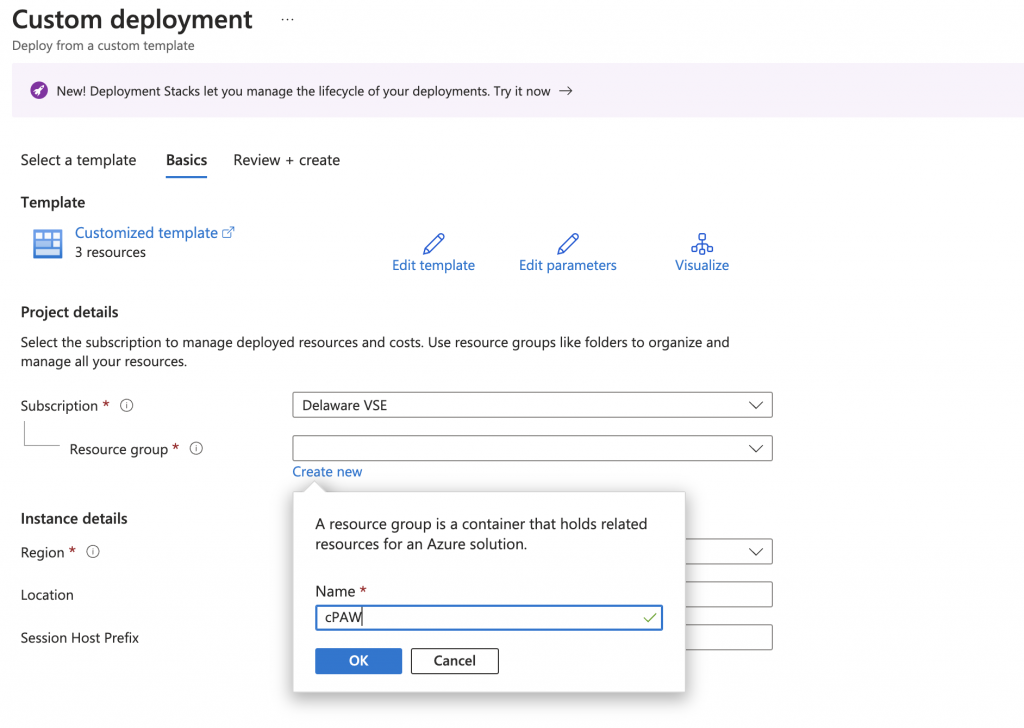
Select the subscription you are going to use for the deployment and then either use an existing Resource Group or create a new one. In my case I created a new Resource Group and called is cPAW.
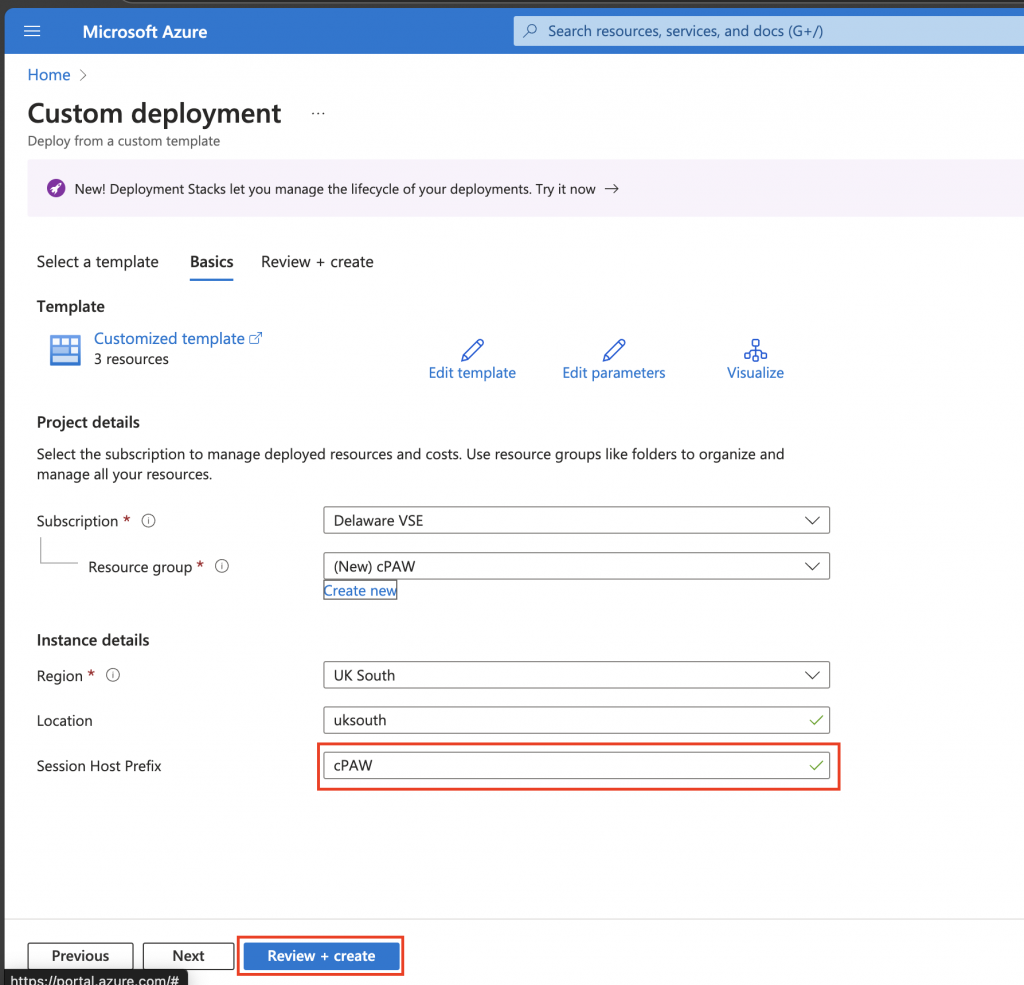
Then set the prefix for the HostPool, Workspace and App Group names. This will also then need to be used in the next script at it will use the same prefix for the session hosts. Now clickReview + create:
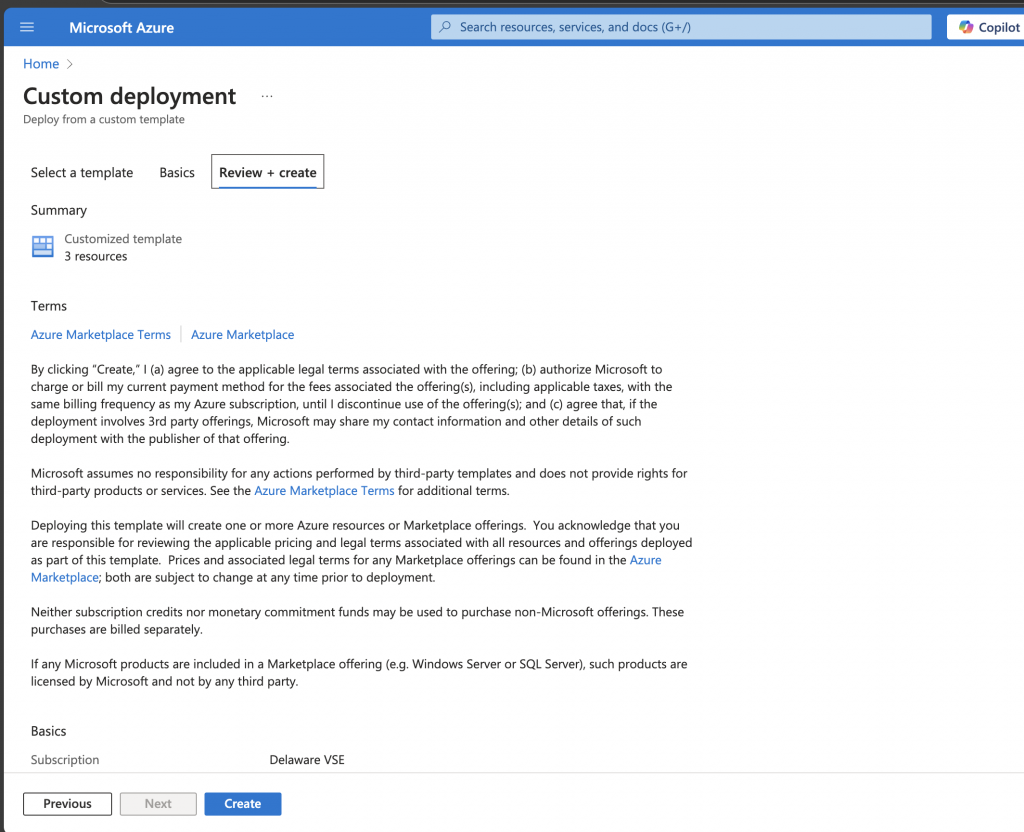
You will then be presented with a screen detailing the Terms etc… much like you do when you create a resource in in the Azure Portal normally by clickingCreateyou are agreeing to the terms:
It should only take moments to deploy:
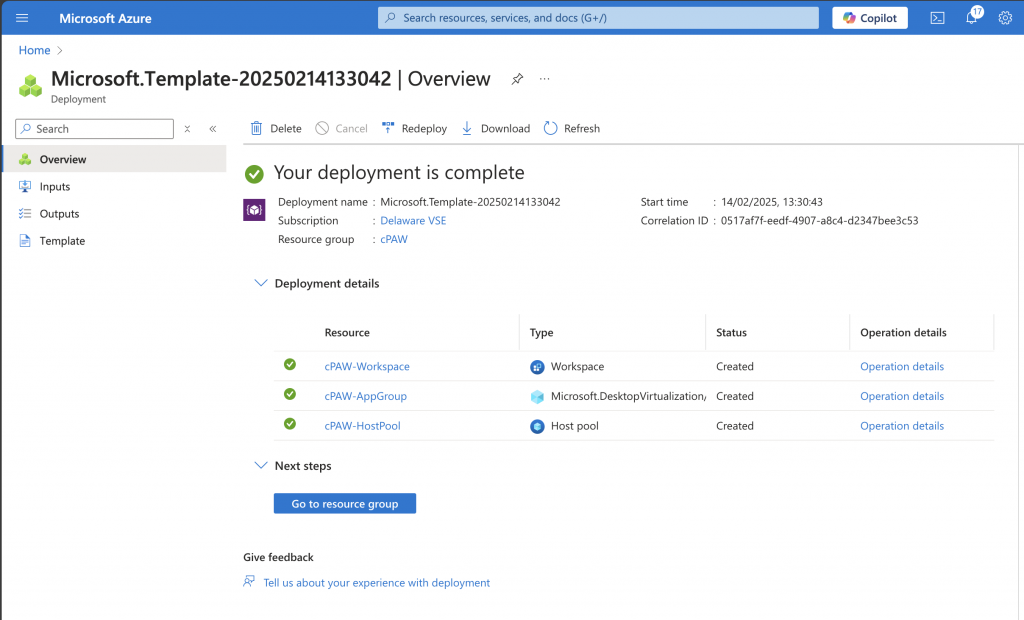
Once deployed you will have your Resource Group, your Hostpool, Workspace and AppGroup:
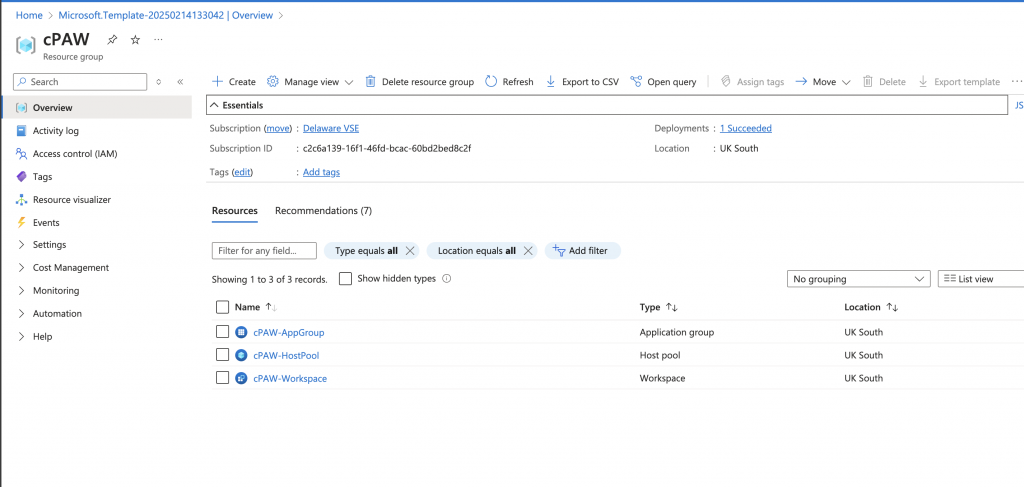
Thats the base infrastructure set for the AVD Environment.
The next thing you need to do is to get the Registration Key of the Hostpool so you can use that in the next step to register the Session Hosts you create
Obtaining the registration key
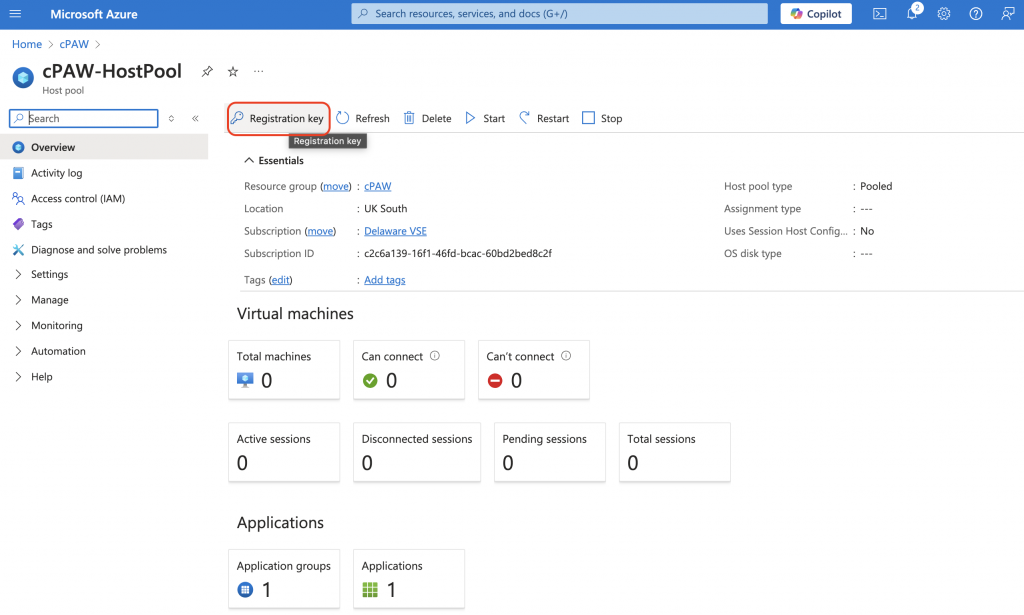
Once you have the basic AVD infrastructure setup go to the Hostpool and click onRegistration key:
Click onGenerate new key. Then set the required duration you would like the key to be valid for, I just set it to be the next day, it filled the time in automatically. Then clickOK.
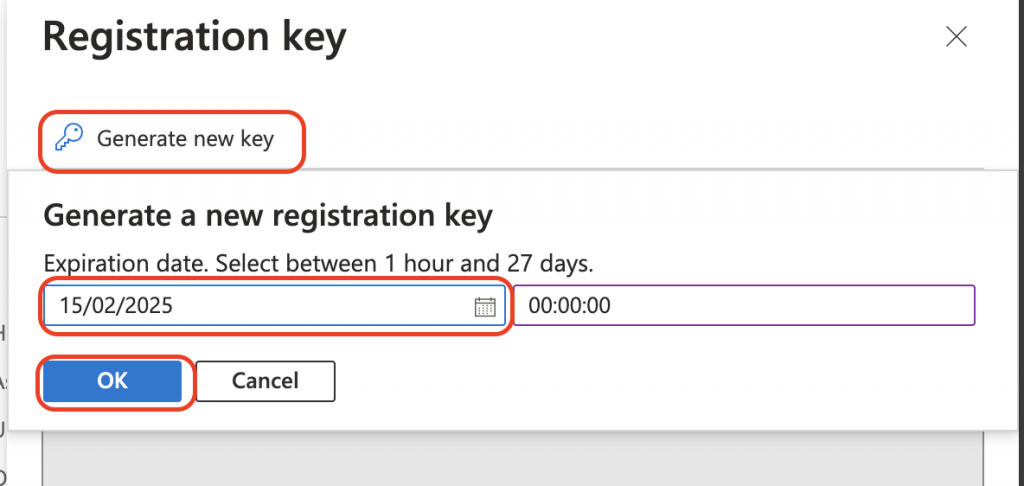
It will then generate the registration key:
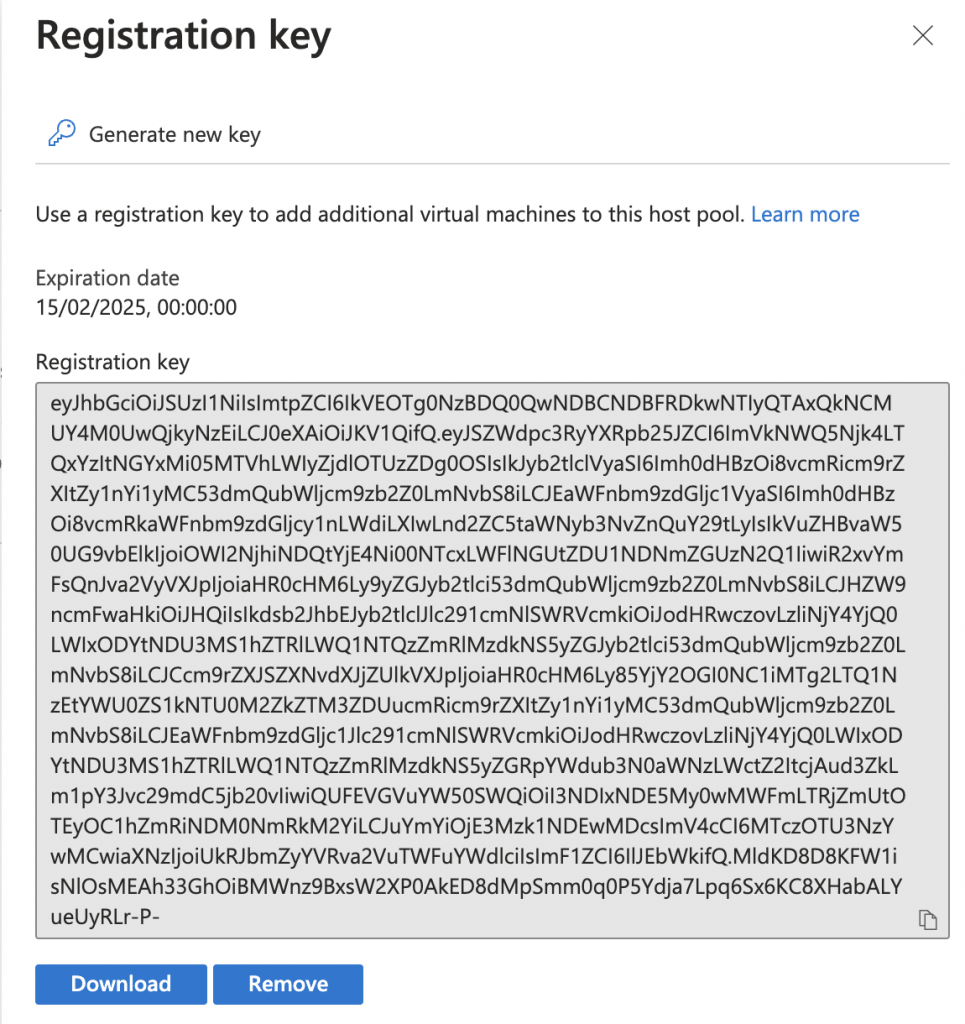
Copy this as you will need this later.Deploying the Session Hosts
Creating the session hosts
So, the next step is to deploy the vNet and the session hosts. This is done in the same way as above by a custom ARM Template. So the Bicep script looks like this:
`paramlocationstring='uksouth'paramsessionHostPrefixstring='cPAW'paramnumberOfHostsint=2@secure()paramadminPasswordstringparamadminUsernamestring='cPAW-Admin'paramhostPoolRegistrationInfoTokenstring='Enter HostPool Registration Key here'varmodulesURL='https://wvdportalstorageblob.blob.${environment().suffixes.storage}/galleryartifacts/Configuration_1.0.02797.442.zip'// Reference the HostPoolresourceHostPool'Microsoft.DesktopVirtualization/hostpools@2021-07-12'existing= {name:'${sessionHostPrefix}-HostPool'}// Deploy the network infrastructureresourcevNet'Microsoft.Network/virtualNetworks@2021-05-01'= {name:'${sessionHostPrefix}-vNet'location:locationproperties: {addressSpace: {addressPrefixes: ['192.168.250.0/24']}subnets: [{name:'${sessionHostPrefix}-Subnet'properties: {addressPrefix:'192.168.250.0/24'}}]}}resourcenic'Microsoft.Network/networkInterfaces@2020-11-01'= [foriinrange(0,numberOfHosts): {name:'${sessionHostPrefix}-${i}-nic'location:locationproperties: {ipConfigurations: [{name:'name'properties: {privateIPAllocationMethod:'Dynamic'subnet: {id:vNet.properties.subnets[0].id}}}]}}]resourceVM'Microsoft.Compute/virtualMachines@2020-12-01'= [foriinrange(0,numberOfHosts): {name:'${sessionHostPrefix}-${i}'location:locationidentity: {type:'SystemAssigned'}properties: {hardwareProfile: {vmSize:'Standard_B4ms'}osProfile: {computerName:'${sessionHostPrefix}-${i}'adminUsername:adminUsernameadminPassword:adminPassword}storageProfile: {imageReference: {publisher:'MicrosoftWindowsDesktop'offer:'Windows-11'sku:'win11-24h2-avd'version:'latest'}}networkProfile: {networkInterfaces: [{id:nic[i].id}]}}}]resourceentraIdJoin'Microsoft.Compute/virtualMachines/extensions@2021-11-01'= [foriinrange(0,numberOfHosts): {parent:VM[i]name:'AADLoginForWindows'location:locationproperties: {publisher:'Microsoft.Azure.ActiveDirectory'type:'AADLoginForWindows'typeHandlerVersion:'2.2'autoUpgradeMinorVersion:trueenableAutomaticUpgrade:falsesettings: {mdmId:'0000000a-0000-0000-c000-000000000000'}}}]resourceSessionPrep'Microsoft.Compute/virtualMachines/extensions@2021-03-01'= [foriinrange(0,numberOfHosts): {parent:VM[i]name:'CustomScriptExtension'location:locationproperties: {publisher:'Microsoft.Compute'type:'CustomScriptExtension'typeHandlerVersion:'1.10'autoUpgradeMinorVersion:truesettings: {fileUris: ['https://raw.githubusercontent.com/andrew-kemp/CloudPAW/refs/heads/main/SessionHostPrep.ps1']commandToExecute:'powershell -ExecutionPolicy Unrestricted -File SessionHostPrep.ps1'}}dependsOn: [entraIdJoin]}]// Join the SessionHosts to the HostPoolresourcedcs'Microsoft.Compute/virtualMachines/extensions@2024-03-01'= [foriinrange(0,numberOfHosts): {parent:VM[i]name:'${sessionHostPrefix}-${i}-DSC'location:locationproperties: {publisher:'Microsoft.Powershell'type:'DSC'typeHandlerVersion:'2.76'settings: {modulesUrl:modulesURLconfigurationFunction:'Configuration.ps1\\AddSessionHost'properties: {hostPoolName:HostPool.nameaadJoin:true}}protectedSettings: {properties: {registrationInfoToken:hostPoolRegistrationInfoToken}}}dependsOn: [SessionPrep]}]`
Convert it to an ARM Template like you did previously in Visual Studio Code and then deploy as a custom script, however you’ll notice a few more options in theCustom Deployment. Firstly select the Resource Group you created in the previous step. I mean you can deploy to another resource group but why would you?
Then, you will need to set the following:
- Session Host Prefix – this will need to match what you set previously
- Number of Hosts – this will be the number of VM’s that you deploy
- Admin Password – This will be the local admin password to access the VM’s locally
- Admin Username – This can be whatever you decide upon. again this will be used to log on to the device locally if needed.
- Hostpool registration key – this is what was created above.
the Admin Password for the Session Hosts. You can also set the Admin username for the hosts by updating the Admin username value. The other thing that you will need is the Host Pool registration key. This will be used to register the Session hosts in the Host Pool.
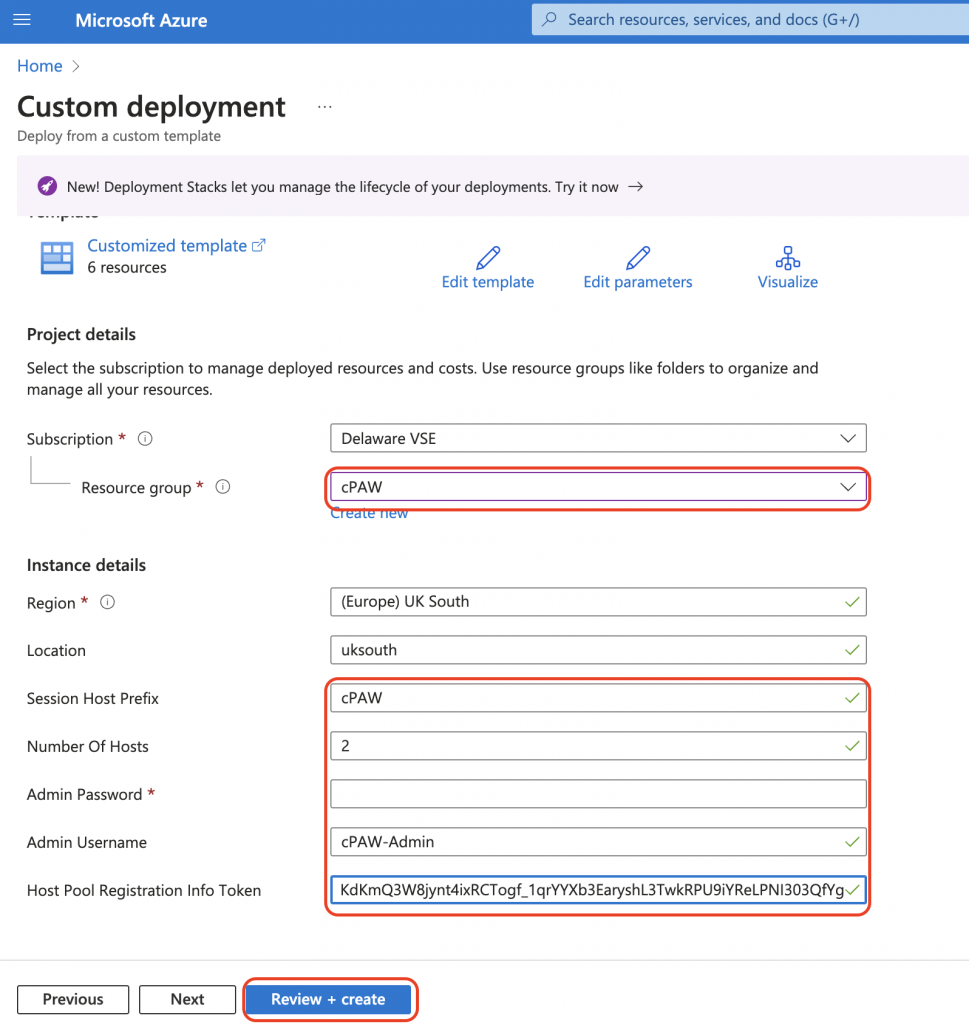
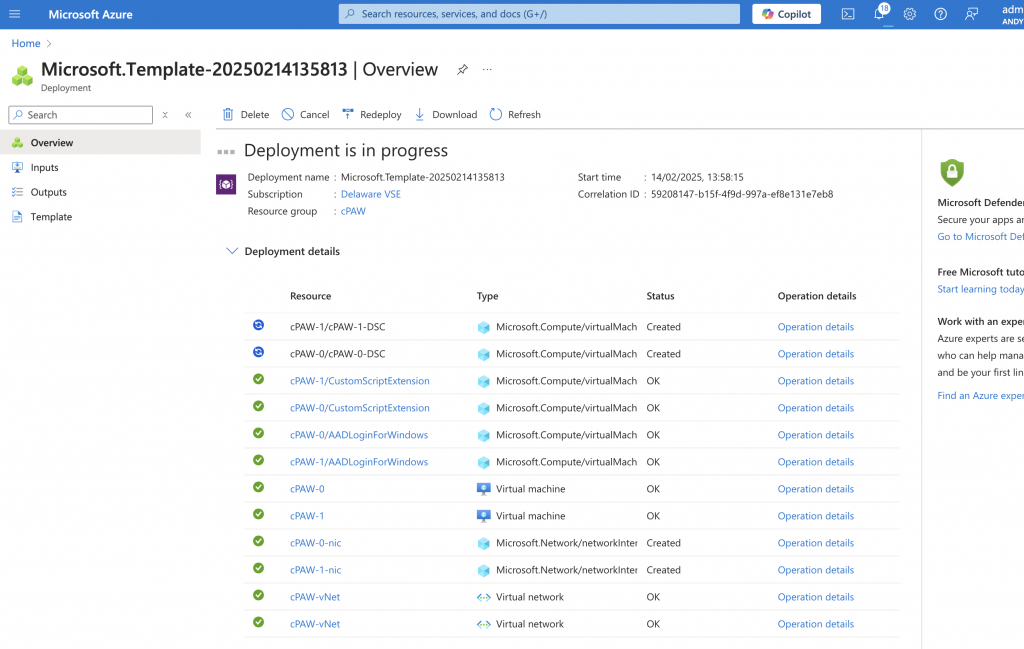
Once all that is filled in click onReview + create. Then clickCreateon the review + create summary, this will take some time to deploy as it is doing the following:
-
Creating the vNet
-
Creating 2 Nics (assuming only 2 session hosts were chosen)
-
Creating 2 Session hosts
-
Then on each of the session hosts it is doing the following:
-
Joining to Entra
-
Enrolling in to Intune
-
Performing some customisation of the session hosts and remove some of the Windows store apps from windows
-
Join the sessions hosts to the hostpool
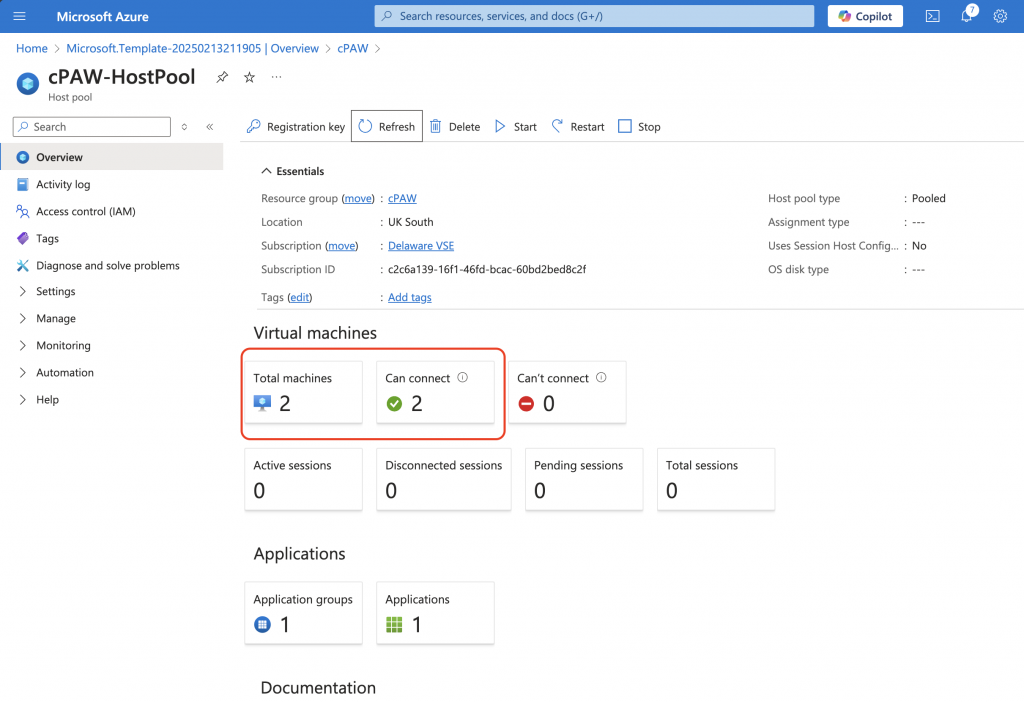
Once deployed if you go to the HostPool you will then see that there are 2 virtual machines available:
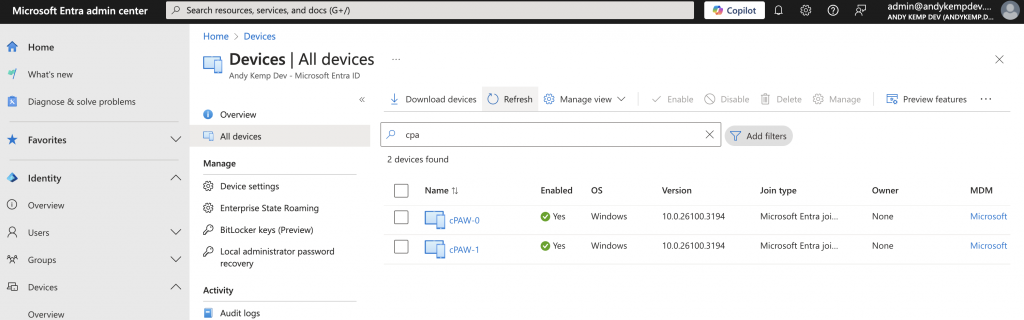
You will then also see them in Devices in Microsoft Entra:
And also you will see them in Intune:
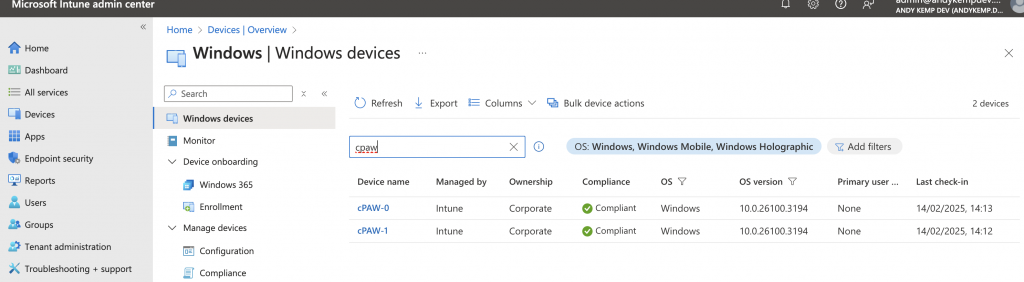
Once this was all setup I added the groups I’d created to the correct permissions and then was able to log on to the Session Hosts, I will detail that in the next series of posts.
Conclusion
This for me is the best way I can deploy AVD, and replicate my set up easily enough. IT means I can standarise my config and it leaves very little room for any miss configuration. Whilst it maybe not the best way to deploy this via Bicep, for me this is certainly a step in the right direction.
Comments
No comments yet — be the first to leave one below.