
This is part 3 of my Always On VPN series
You can review the pervious posts if required:
- Always On VPN Entra Join – Part 1 Whats needed – Andy Kemp
- Always On VPN Entra Join – Part 2 Certificate Templates – Andy Kemp
- Always On VPN Entra Join – Part 3 Core Always On VPN Infrastructure – Andy Kemp
- Always On VPN Entra Join – Part 4 Configure Always On VPN for Entra Joined Devices – Andy Kemp
- Always On VPN Entra Join – Part 5 Deploy Always On VPN for Entra Joined Devices – Andy Kemp
Introduction
Now we have the certificates available the next step is to configure the certificates and then deploy and configure the servers. This part of the series will cover off configuring the certificates on the servers, installing the roles and then configuring them. This will then provide you with the base infrastructure for Always On VPN.
I should also note that this setup is using a single NIC where my RRAS server is in Azure as for some reason a server running in my home lab would not forward any traffic when connected.
I am also a big fan on not logging on to a server via a remote desktop unless you absolutely have to which is why I use all the tools available to manage the servers like Server Manager, Remote PS Sessions and Windows Admin Center (Or as I spell it CENTRE :))
Certificates
Currently I am needing to log onto the servers directly to install the Certificate, not ideal, but it works. Moving forward I am looking to see if there is a way to do this remotely without the need to log on to the Servers Desktop.
VPN Server Certificate
The VPN certificate requires the name of the connection to be present (not the name of the server). So, in my case my VPN address will be vpn.andykemp.dev.
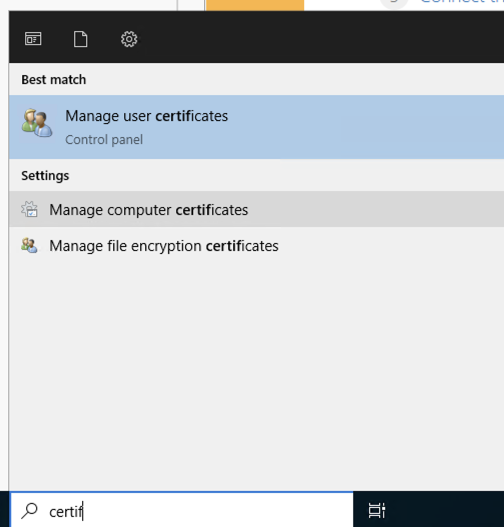
Load up Computer Certificates on the server:
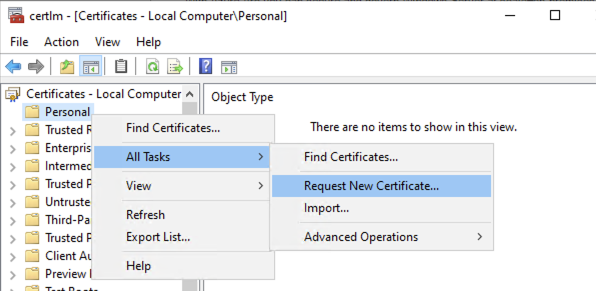
Right click onPersonaland selectAll Tasks > Request New Certificate:
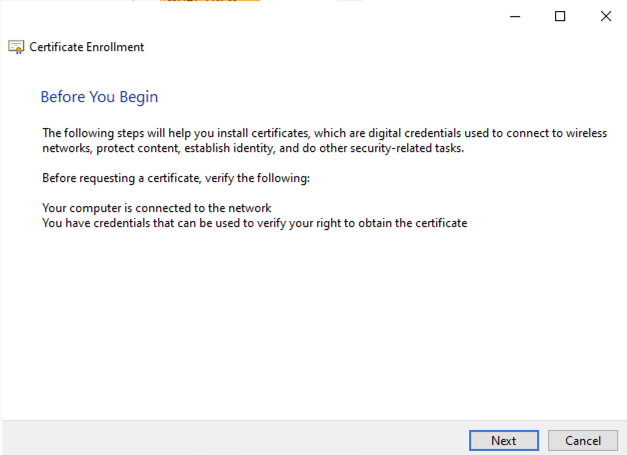
ClickNextin theBefore You Beginpage:
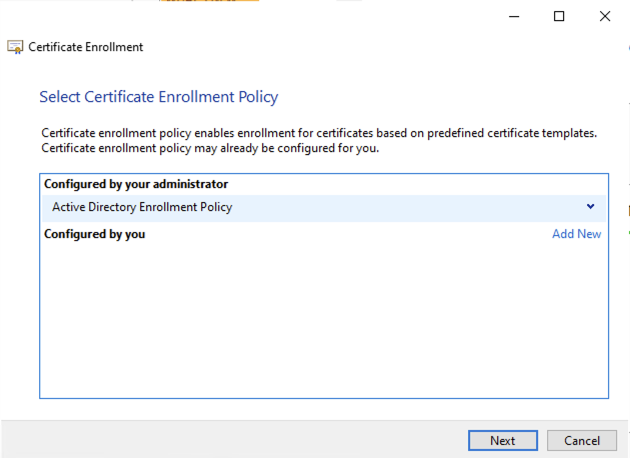
SelectActive Directory Enrollment Policyand then clickNext
Select the Certificate Template you created (AOVPN-RRAS), then click on the link for warning “More information is required to enroll this certificate. Click here to configure settings.”:
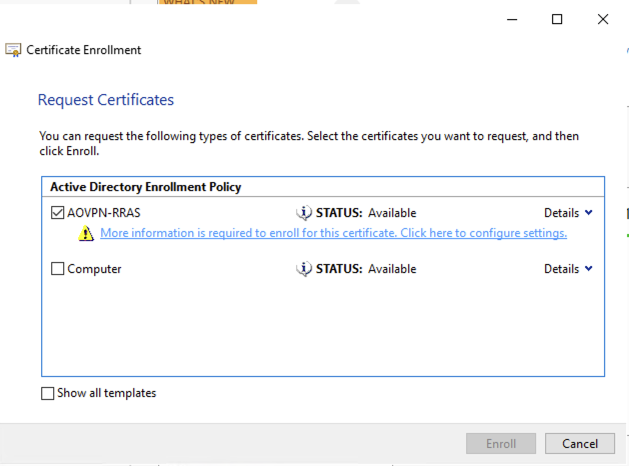
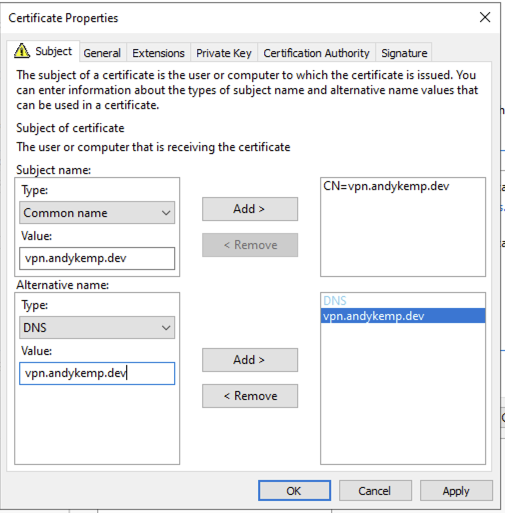
Add theSubject Namewith aCommon Nameof the address for your VPN (vpn.andykemp.dev in my case) and also add anAlternative Namewith the type of DNS with the same Value and then click onOK:
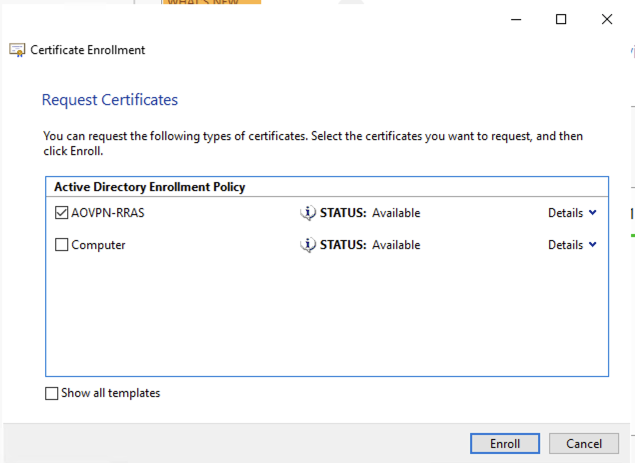
Then click onEnrollon theRequest Certificatewindow:
NB: if you get an error you may need to restart you VPN Server
Once done clickFinish:
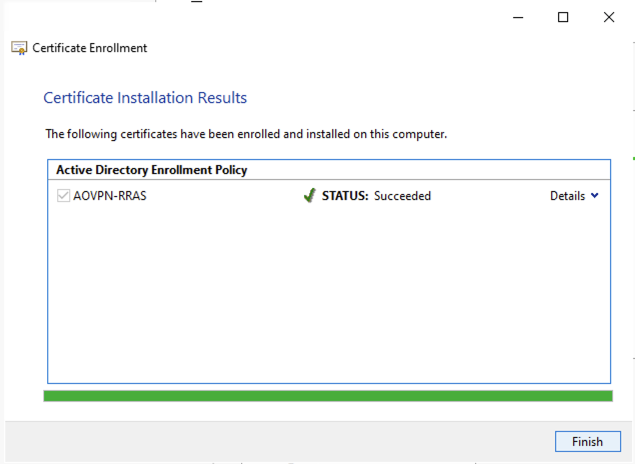
Thats the VPN Sever Certificate installed
NPS Certificate
Perform the same process on the NPS server with the exception that you need to select the AONP-NPS template and you do not need to set a Common Name or Alternative name, it will build the subject name from AD:
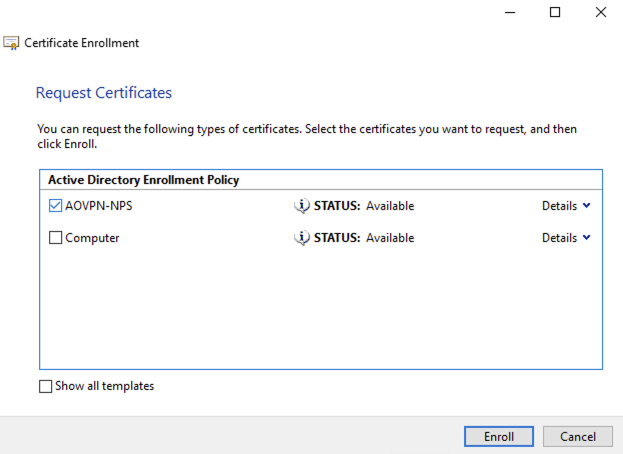
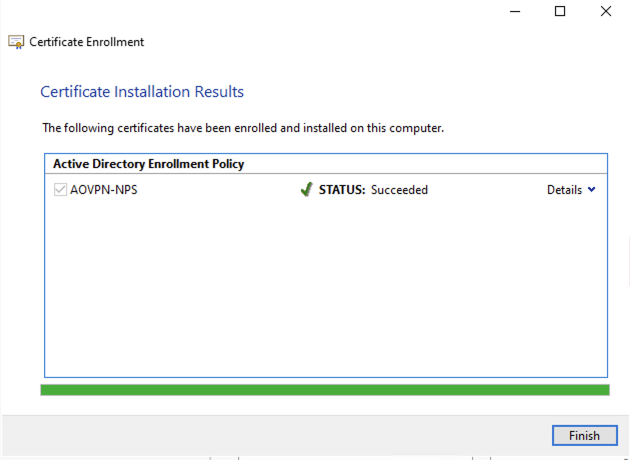
Thats the Server Certificates issued
Install the roles on the servers
Next, lets install the roles on the servers. Now, you could connect to the server and install via server manager, but, that really isn’t the right way to install roles on servers, ideally you should not be logging on to servers unnecessarily, unless you absolutely need to (like the certificates in my case above). So for me, I like to install the roles and features via Server Manager, Windows Admin Centre or from the Command Line, from a PAW or a Management Device.
VPN Server Role
The VPN Server uses the Routing and Remote Access Services. To install this remotely via the server manager either right click on the RRAS server and selectAdd Roles and Features:
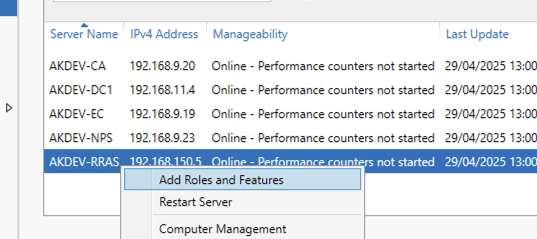
Or Click onManageandAdd Roles and Features
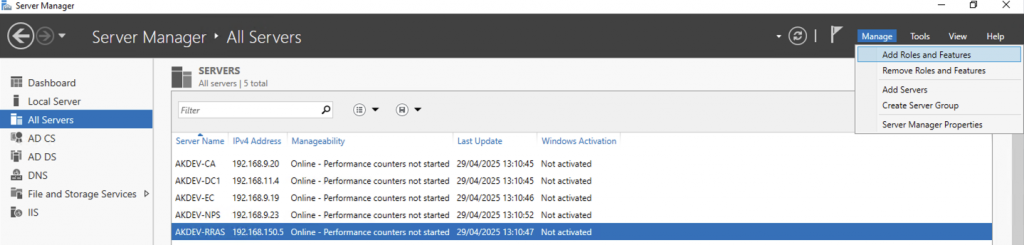
ClickNextthrough theBefore You Beginand theSelect installation type
On theSelect destination serverselect the server that RRAS is to be installed on:
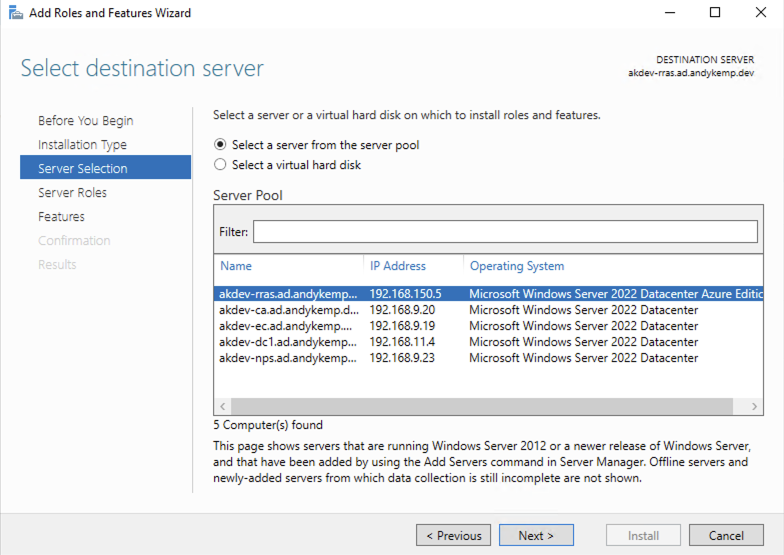
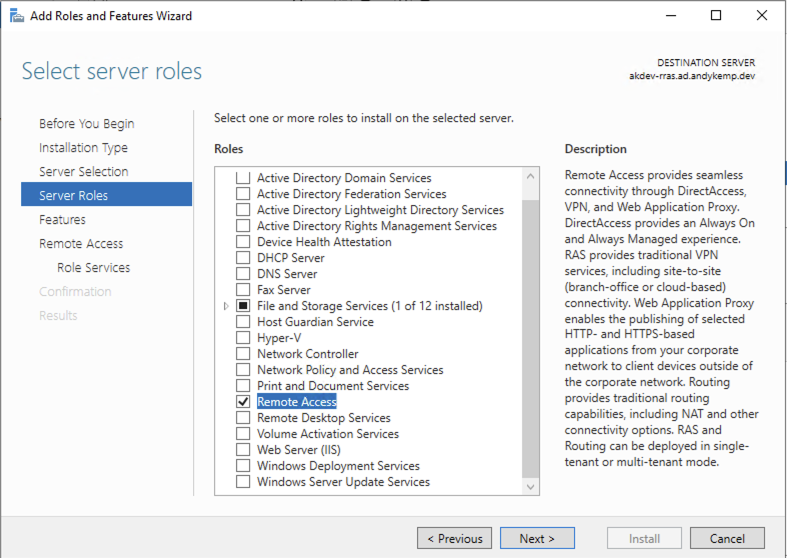
SelectRemote Accessand then clickNext
Do not worry about selecting anything on theSelect featuresjust clickNext.
ClickNexton theRemote Accessdescription, then, on theSelect role servicespage selectDirectAccess and VPN (RAS), when prompted to install additional features clickAdd featuresand then clickNext
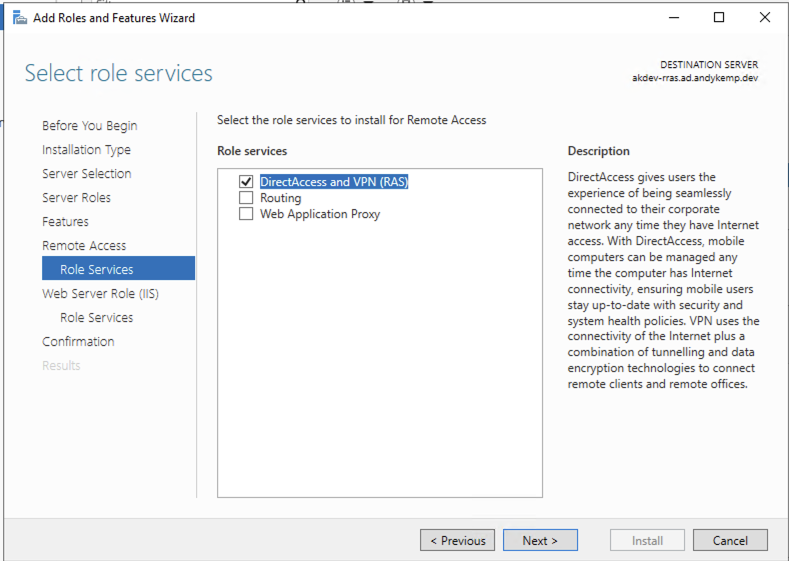
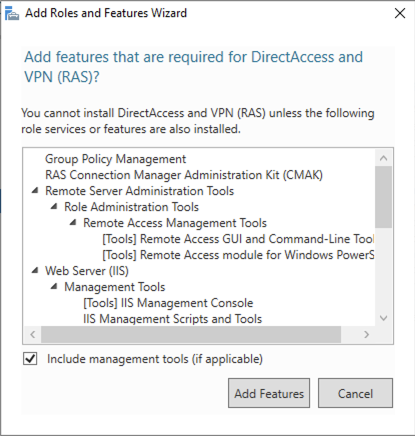
Click through the next few prompts withNextand then clickInstall:
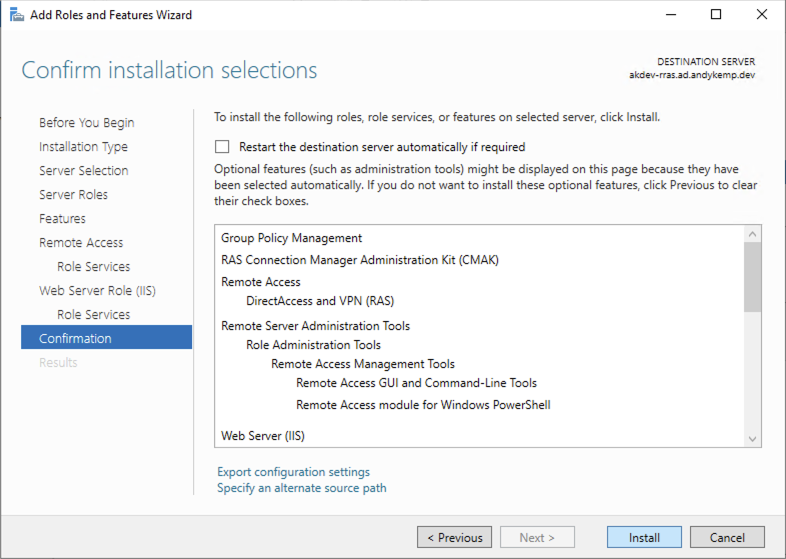
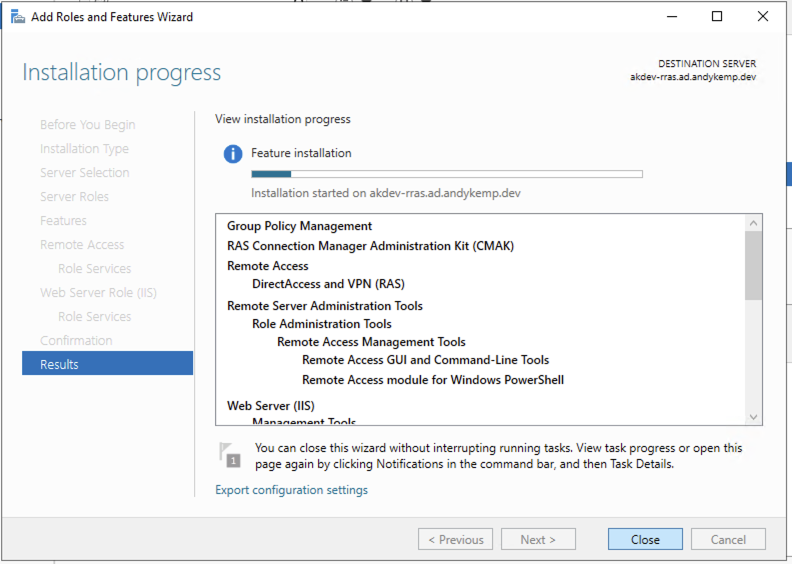
Alternatively, this can be installed via a single command via a remote PSSession:
Install-WindowsFeature DirectAccess-VPN -IncludeManagementTools
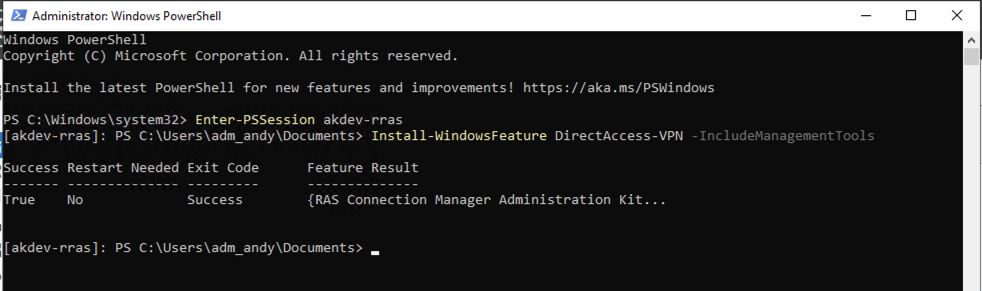
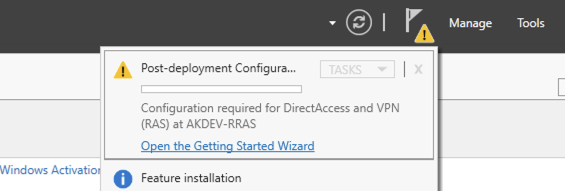
Once installed regardless of which way Server Manager will prompt for the post deployment config of DirectAccess and VPN:
NPS Server Role
For the NPS I just chose to install via the command line from my PAW:

Configure the roles
Once the roles are installed you’re ready to configure them.
VPN Server
In server manager (on your PAW) click onOpen the Getting Started Wizardand selectDeploy VPN only:
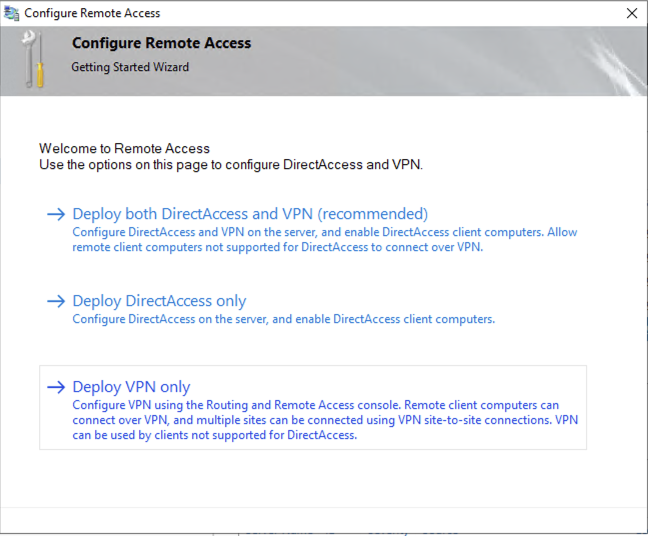
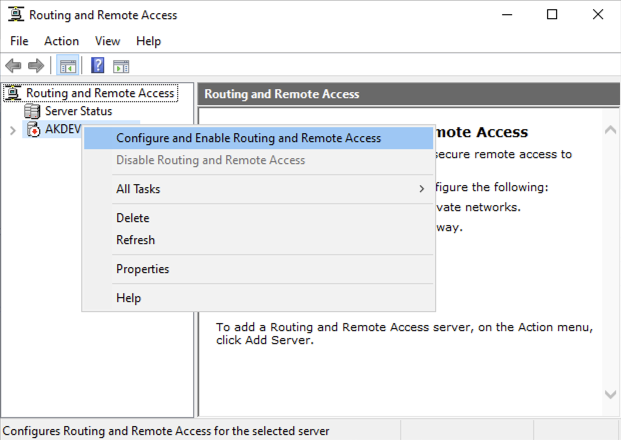
You will then be presented with the Routing and Remote Access management tool. Right click on the Server and selectConfigure and Enable Routing and Remote Access:
As I am running this from a PAW it will load up the local tool which tries to connect to the local device, so I want to remove this device from the tool and add the RRAS server.
To remove the current computer right click and selectDelete:
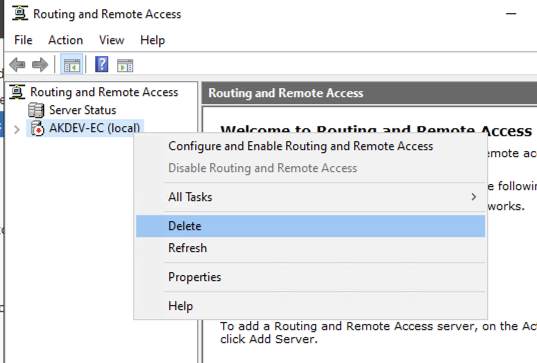
The right click on theServer Statusand selectAdd Server…:
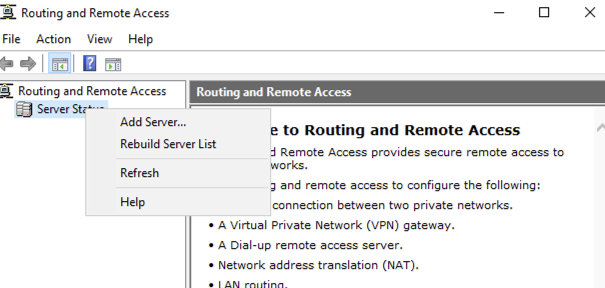
Add the name of your RRAS Server and then click onOK:
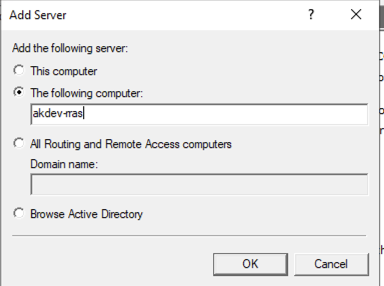
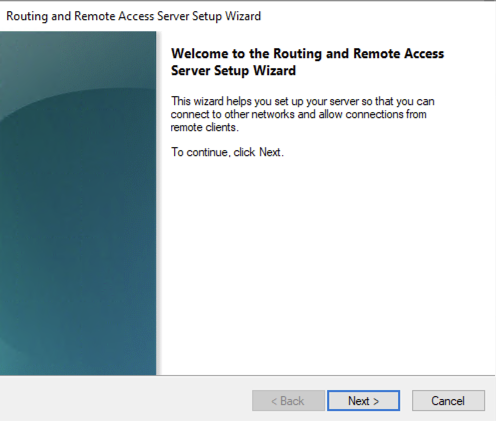
You will then get the Setup Wizard for RRAS Follow the steps in the Wizard:
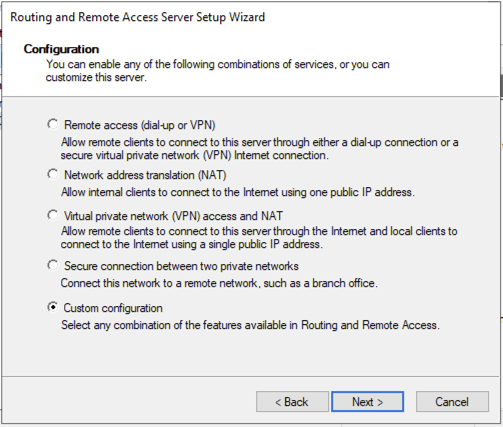
SelectCustom configuration
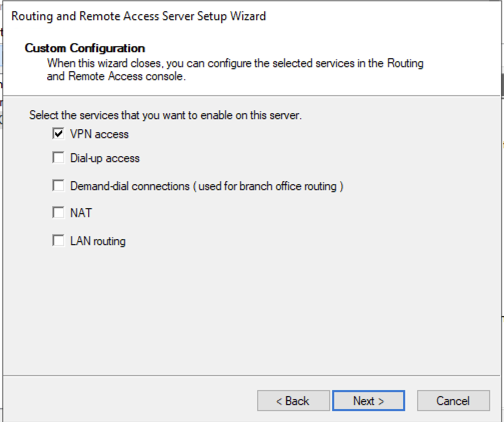
SelectVPN Access
ClickFinish
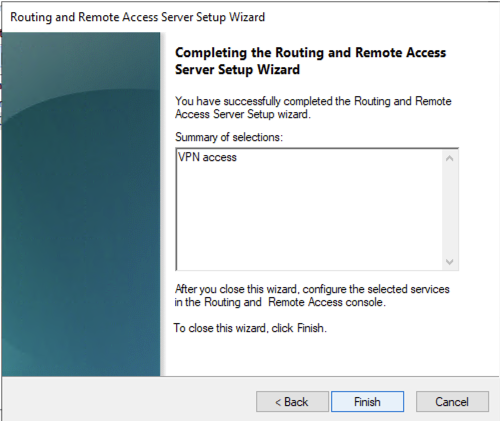
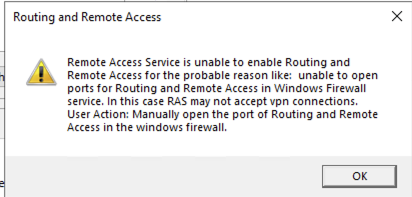
If presented with warning click onOK
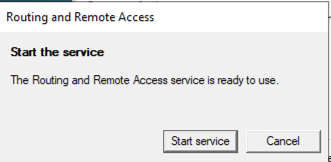
ThenStart servicewhen prompted to
You will then see that RRAS is initially setup:
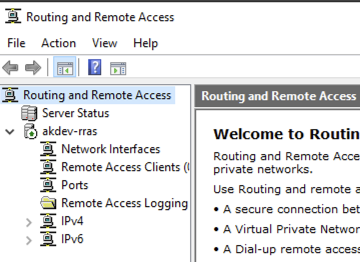
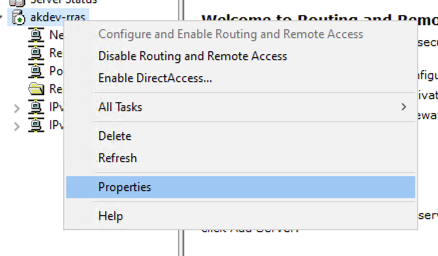
To configure RRAS right click on the Server and selectProperties
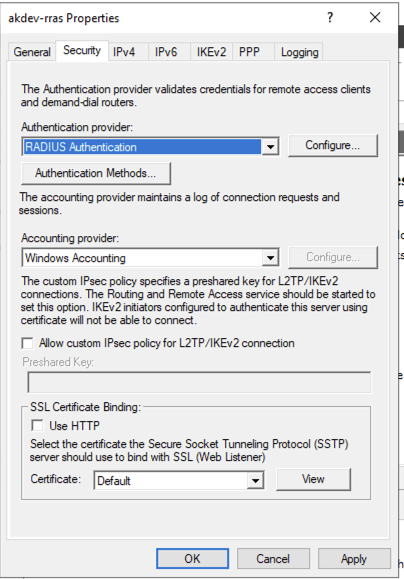
On theSecuritytab change theAuthentication providertoRADIUS Authentication:
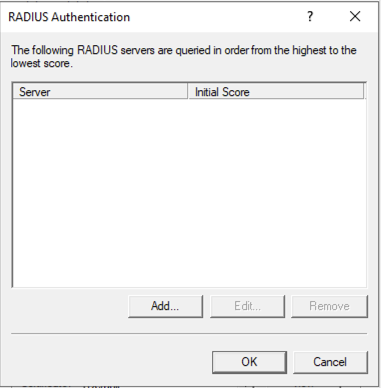
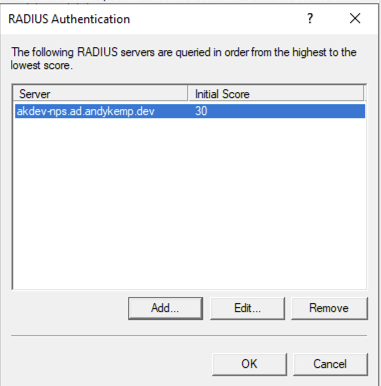
Then clickConfigurenext toRADIUS Authenticationand then clickAddto add a new NPS Server:
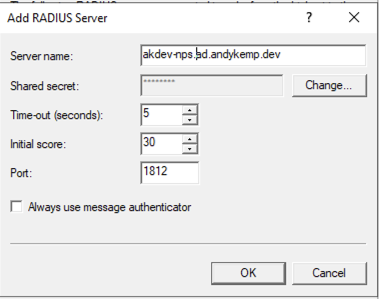
Add theServer nameand then clickChangefor theShared Secretand enter a long shared secret eg: SrWajgdFbYdBBPekezGTYOhuYCAL9Aa9PM4MfA3cCvPUmvmDzquJ3RqQvNPxgvKc (you will need this for the NPS server as well)
Then clickOKto close the Add RADIUS Server windows and then clickOKagain in the RADIUS Authentication winow:
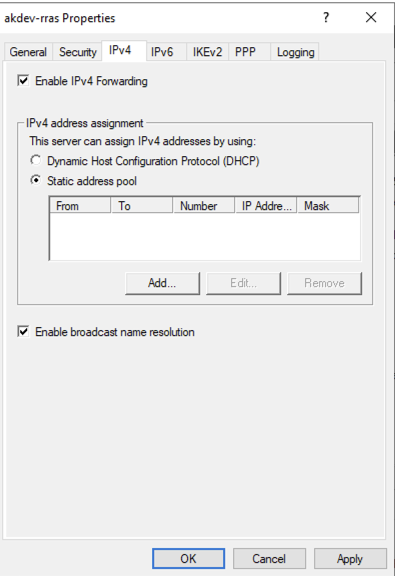
Next go to theIPv4tab and selectStatic address pool:
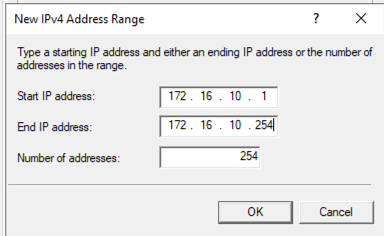
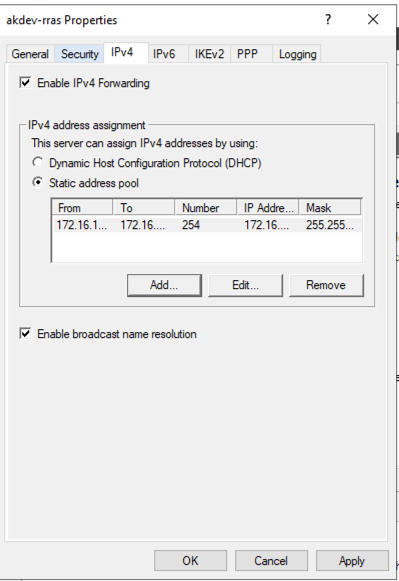
ClickAddand enter in an IP Address range for you VPN Clients to use, then click onOK:
Then clickOKto close the Server Properties:
Next we just need to configure the ports, so right click onPortsand selectProperties:
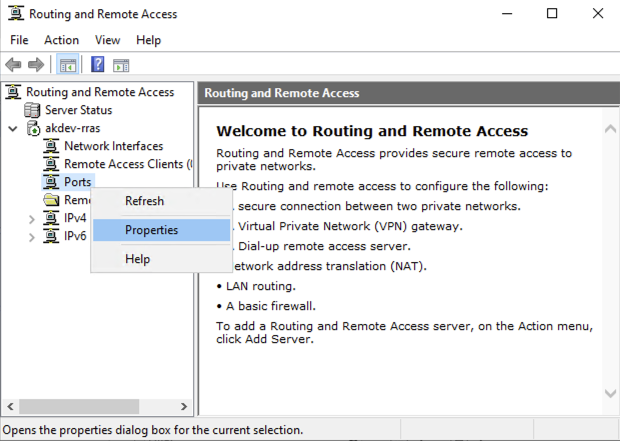
You will then see all the connection types:
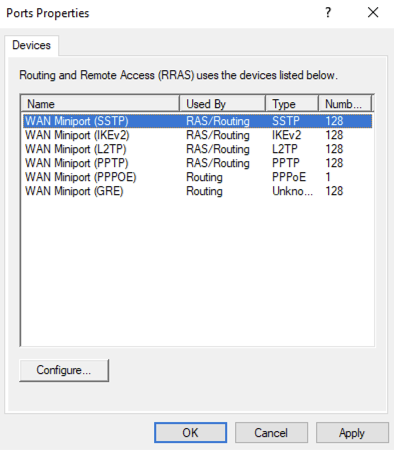
Double click on**WAN Miniport (SSTP)and unselectRemote access connections (inbound only)**and click ok:
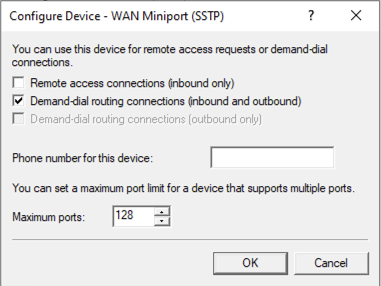
Do the same forWAN Miniport (L2TP),andWAN Miniport (PPTP)
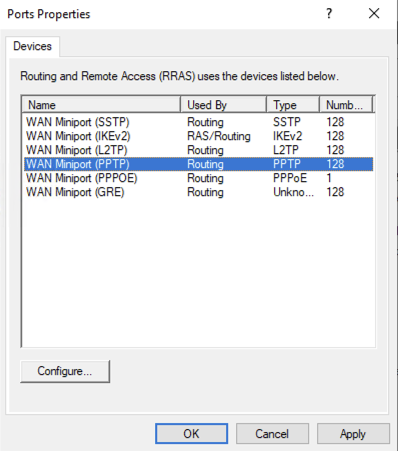
This will leaveWAN Miniport (IKEv2)the only one withRAS/Routing
Then Click onOK
Thats your RRAS Server now setup.
Network Policy Server
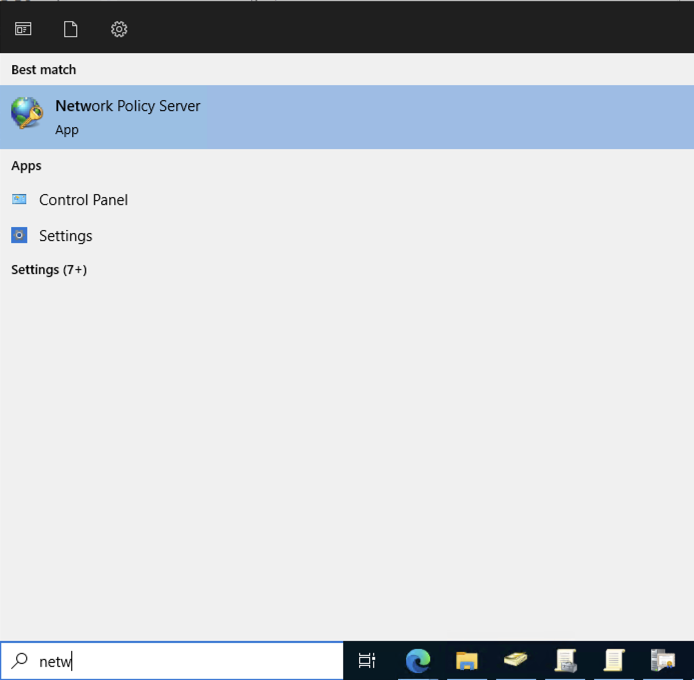
The next thing to do is configure NPS. I had issues access in the NPS Console from my management device so I did end up logging on to the desktop of the server for the initial config
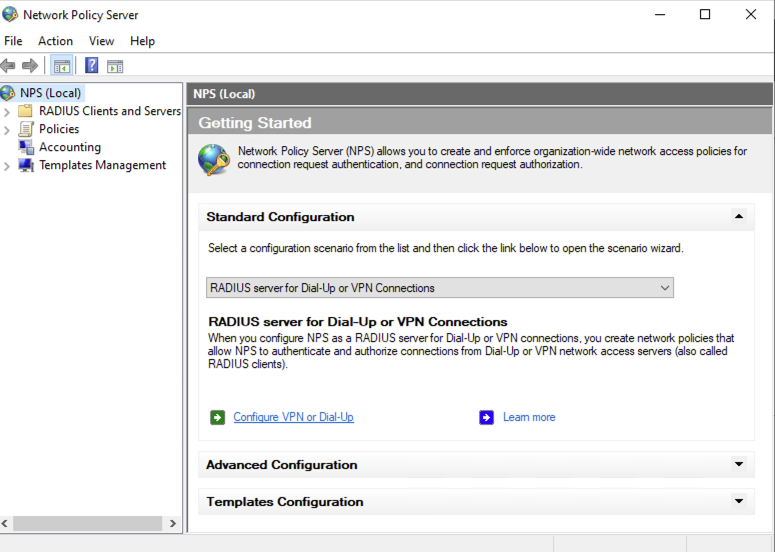
Once loaded click onConfigure VPN or Dial-Up
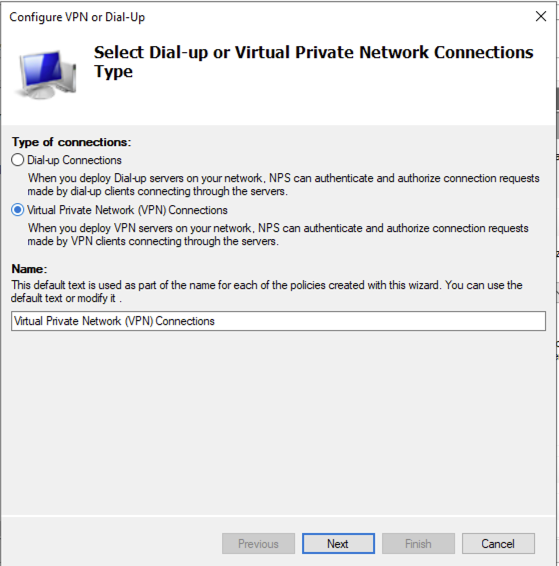
SelectVirtual Private Network (VPN) Connection
You can leave the name as it is or rename if you wish. Then ClickNext:
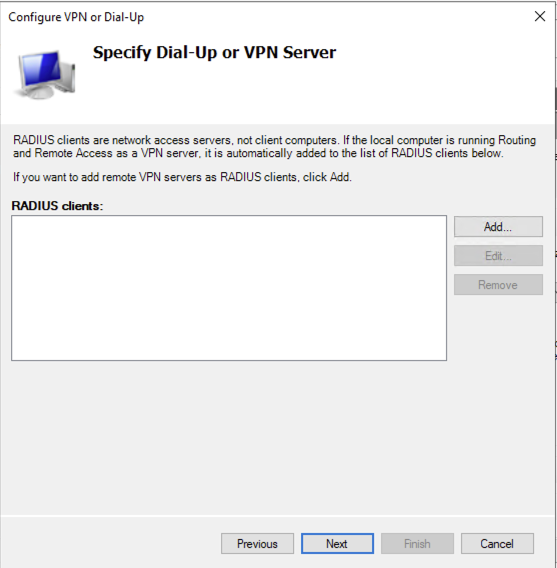
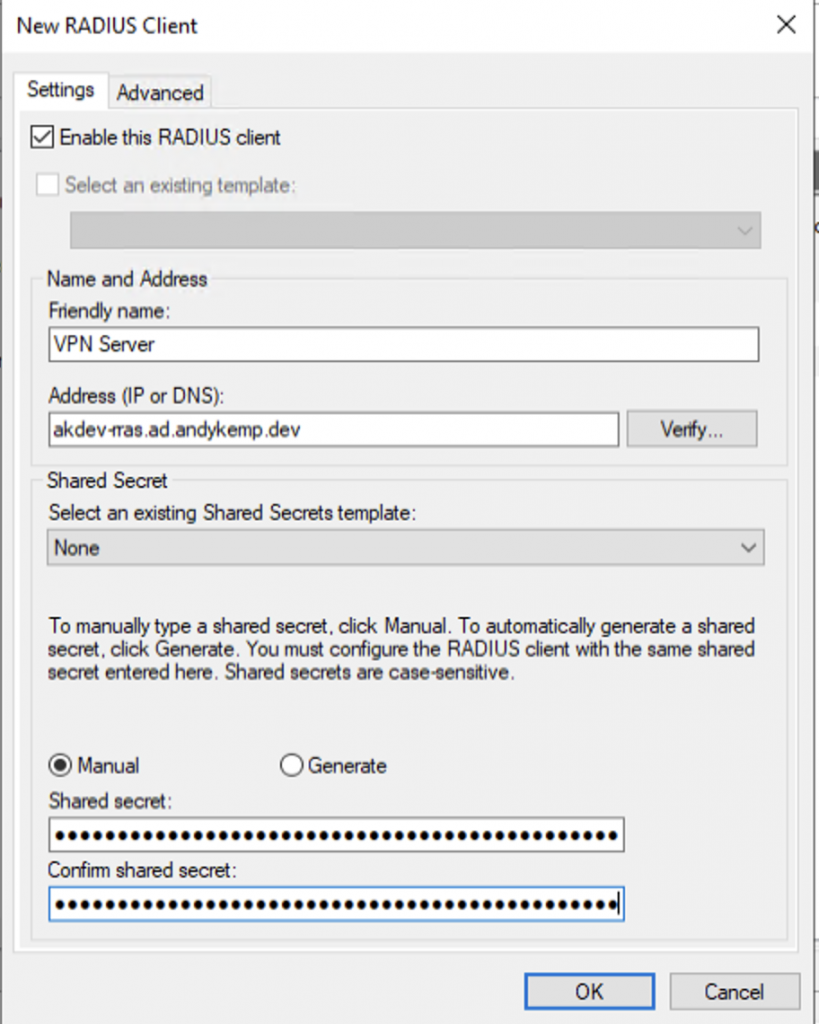
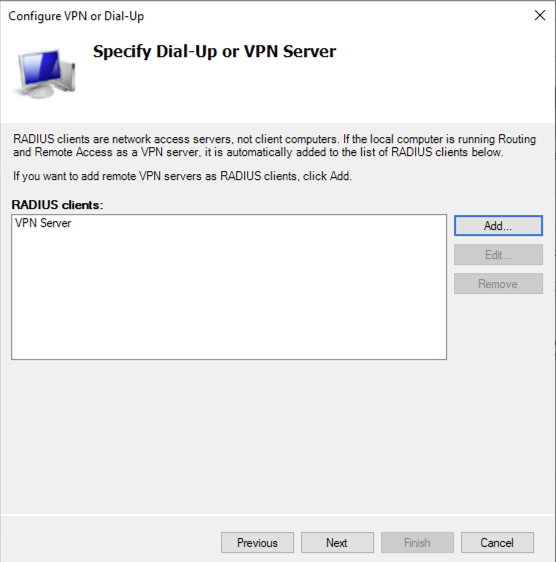
We now need to add the RADIUS Client AKA your VPN server, so clickAdd:
Enter in a friendly name for the RRAS server and then add the IP Address or the FQDN. add the shares secret created earlier in theShared Secrettext fields then lickOK:
You now have the VPN Server configured for RADISU auth. ClickNext:
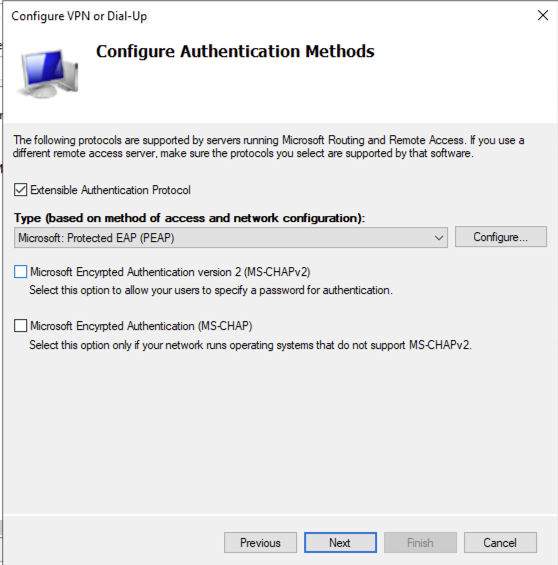
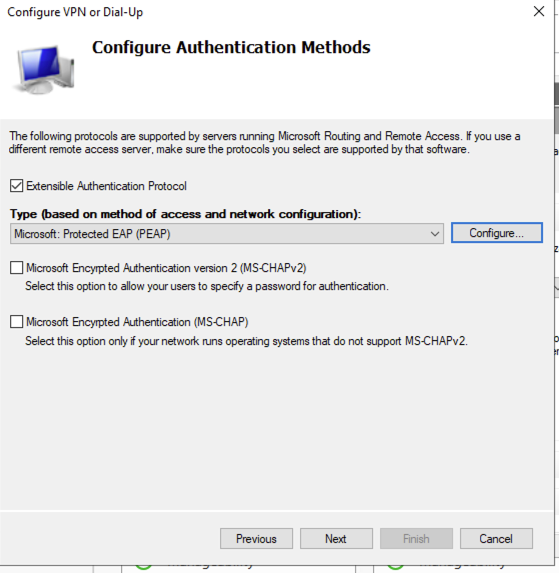
Next we have to set the Authentication methods SelectExtensible Authentication Protocoland then ensure thatMicrosoft: Protected EAP (PEAP)is selected. De-selectMicrosoft Encrypted Authentication version 2 (MS-CHAPv2)and then clickConfigure…:
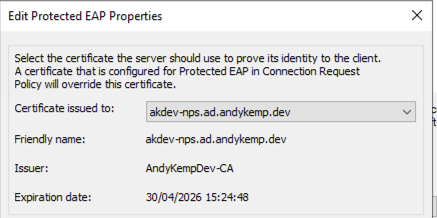
Ensure that the servers certificate is selected in theCertificate issued to:
RemoveSecured password (EAP-MS-CHAP v2)and then click onAddand selectSmart Card or other certificatethen clickOK
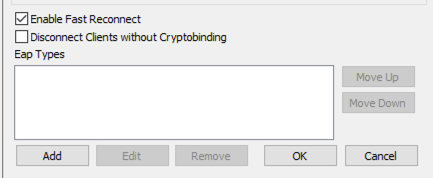
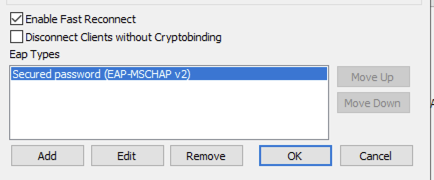
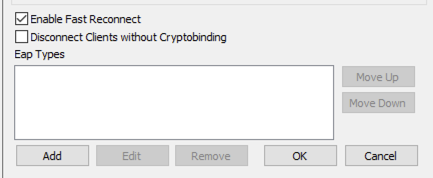
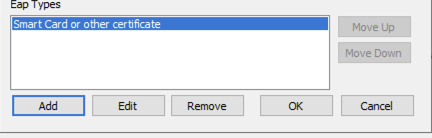
Now you have the Authentications Method set clickNext
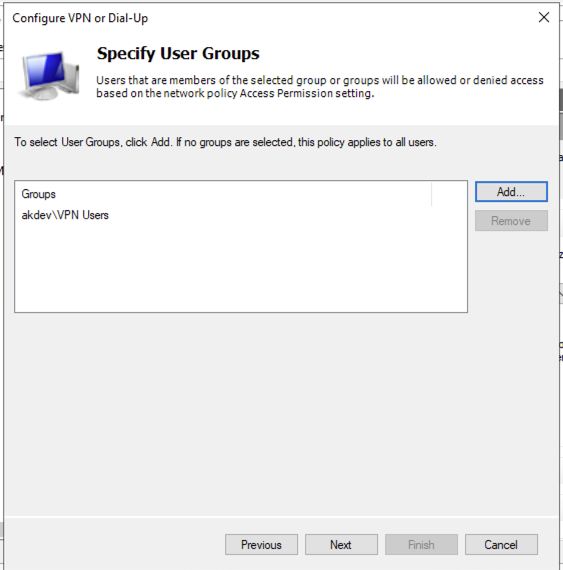
Ensure that theVPN Usersyou created previously is added to theGroups:
No you’ve added this you can clickNextthrough the next few screens (Specify IP Filters, Specify Encryption Settings, Specify a Realm Name). Then on the final window you can clickFinish:
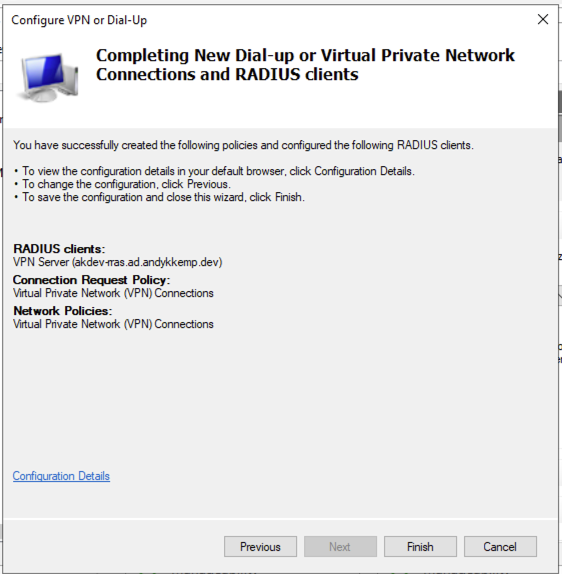
And that is your Servers configured
Create a VPN Template and test
This next step it to purely demonstrate that the infrastructure is there and working and I carried this out via a Domain Joined device as I also took you through the process of creating a certificate for Domain Joined devices.
Verify the User Certificate is avilable.
Remember in the previous post we set the permission for members of theVPN UserGroup to beAuto Enrollwell this is why, when the user logs on it will pull down a certificate automatically. To verify this loadManage User Certificates
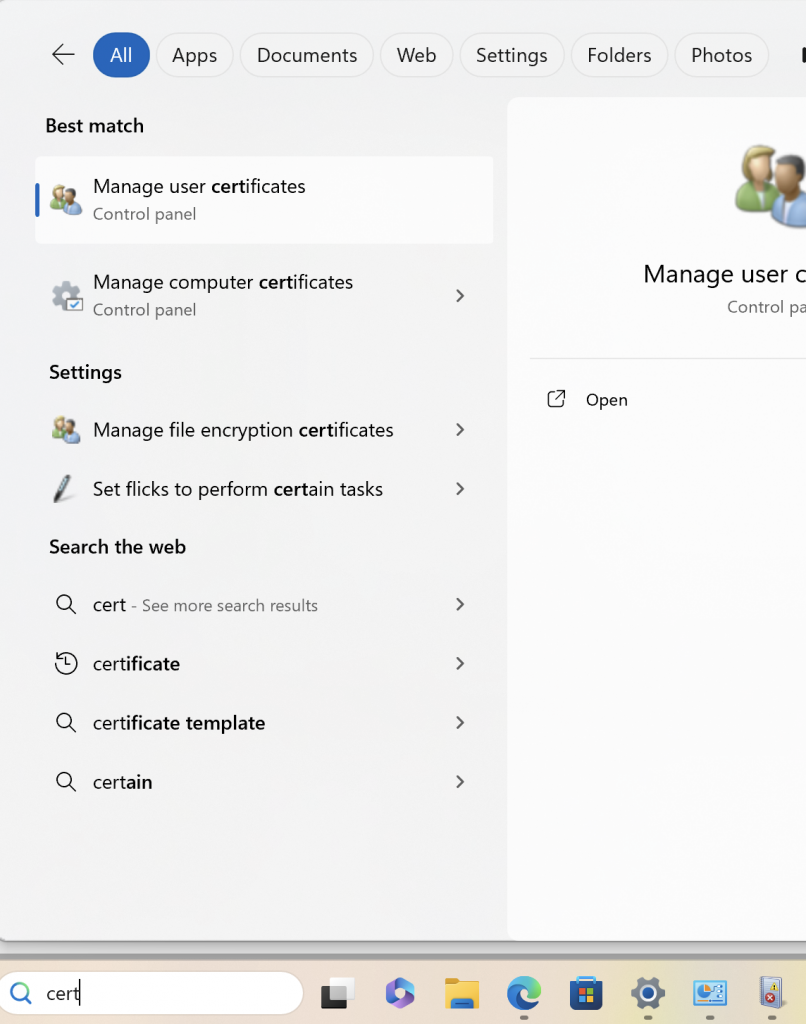
then go toPersonal > Certificatesand you should see a certificate with the name of the user:
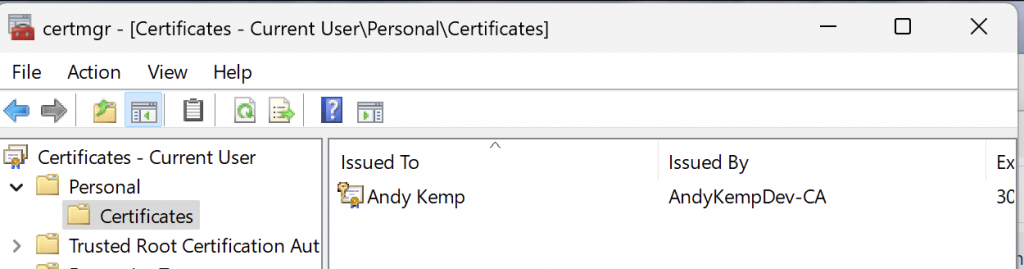
if not, don’t worry it may be due to Group Policy not updating, so if you do not see the certificate or theCertificatebranch of the tree view then fear not
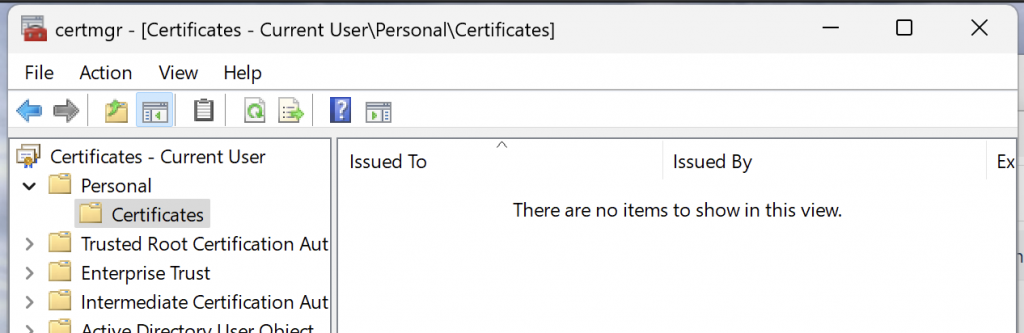
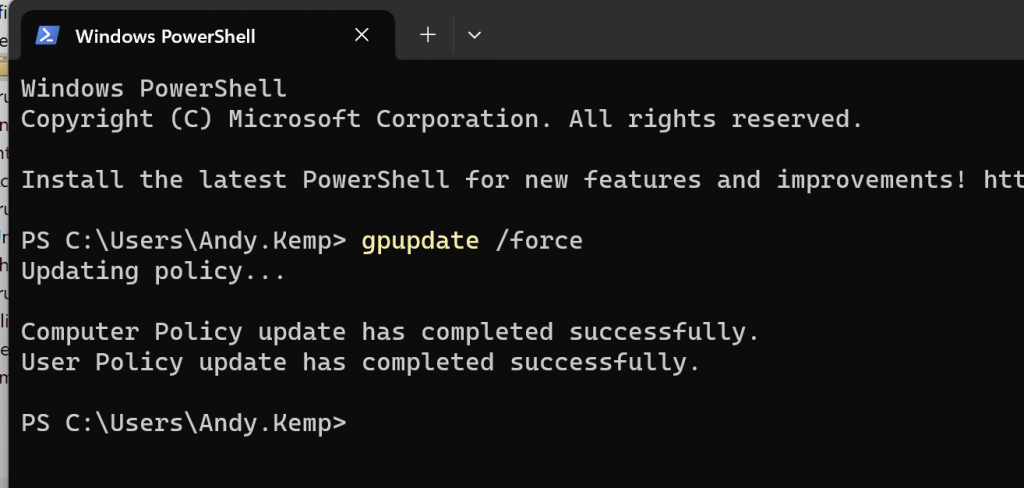
Run a Command Prompt or Terminal as the user and then run aGPUPDATE /Forceto refresh the policies:
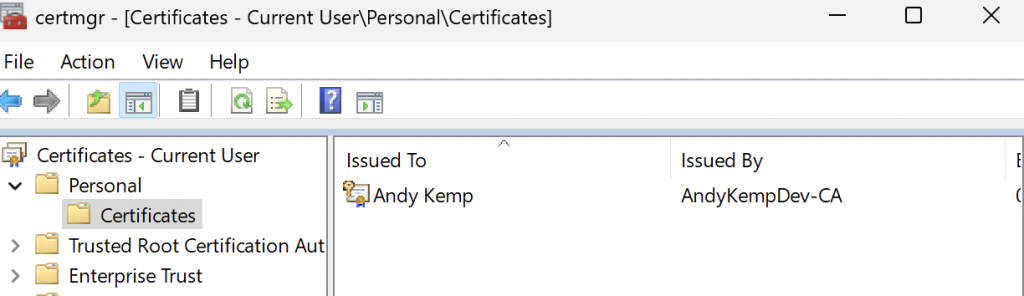
Then go back to the certificate and refresh the view and you should see the certificate. IF not then I suggest you go back and review the certificate templates you created as it is not being published.
Now you have verified that the Certificate is in place you can create the test connection. So connect your test machine to a separate internet connection, verify you’re not conencted to your AD by pinging the domain name:
You can verify that the device is no connected to the domain by trying to ping the domain name:

Then run the following command in Terminal to create the template connection:
`Add-VpnConnection-Name"AndyKempDev-Templte"-ServerAddress"vpn.andykemp.dev"-TunnelType"IKEv2"-EncryptionLevel"Maximum"-AuthenticationMethod Eap-Force-PassThru`
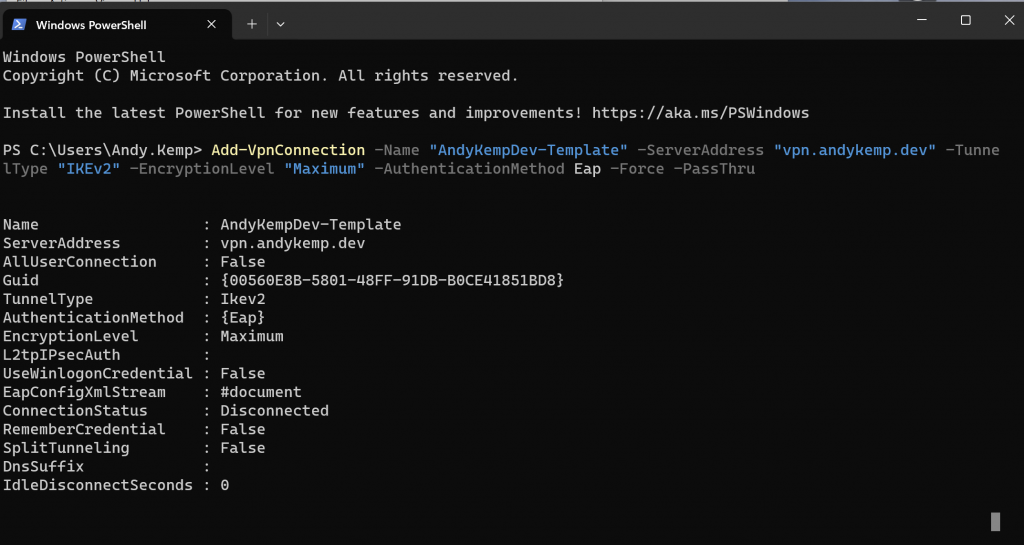
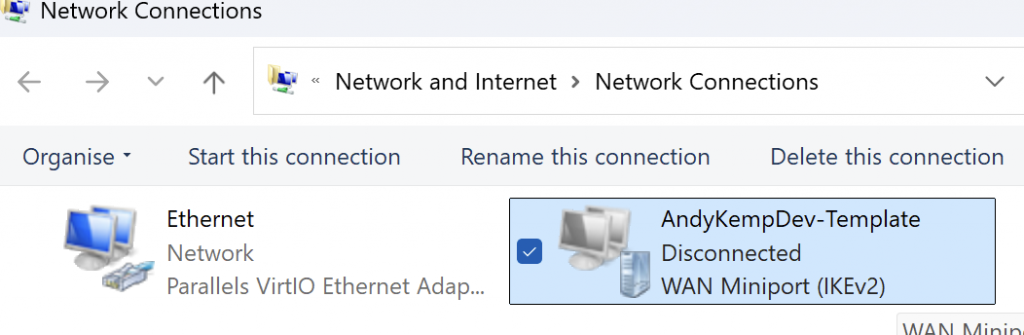
Once run you will see inNetwork Connectionsthat you have a new connection labeled with the name you specified:
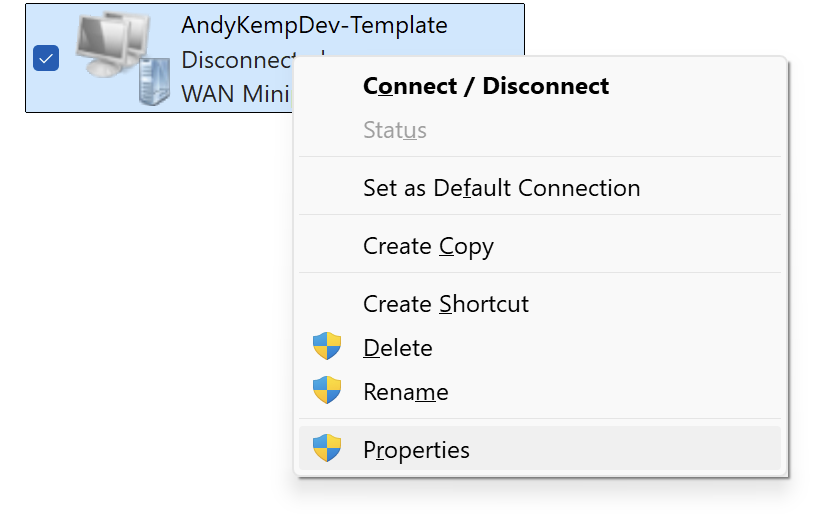
You’re not quote ready to connect to the VPN yet, we need to make a few more changes, soright clickon the connection and selectProperties:
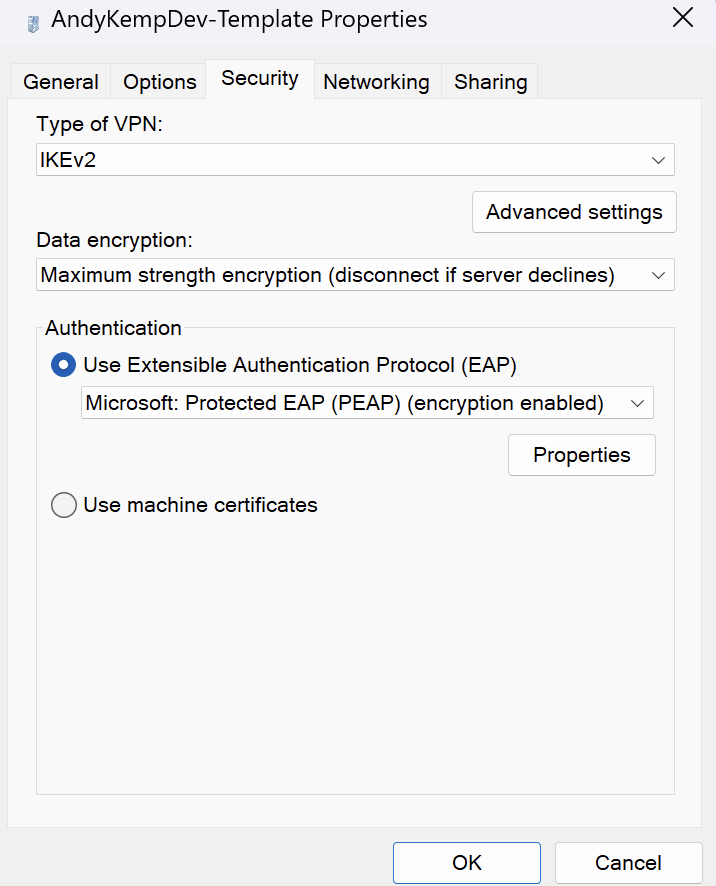
On theSecuritytab make the following updates:
Change theUse Extensible Authentication (EAP)optionfromMicrosoft Secured password (EAP-MSCHAP v2) (encryption enabled)toMicrosoft Protected EAP (PEAP) (encryption enabled)
Then click onPropertiesand set the following:
EnsureVerify the server’s identity by validating the certificateis enabled EnableConnect to these serversis set to he NPS server name Ensure that the Certificate Authority for the domain is selected Notifications before connectingshould be set toDon’s ask user to authorise new servers or trusted CA’s and ensure thatSmart Card or other certificate (EAP-TLS)is selected forSelect Authentication Method.
Once those are set as below don’t click onOKjust yet.
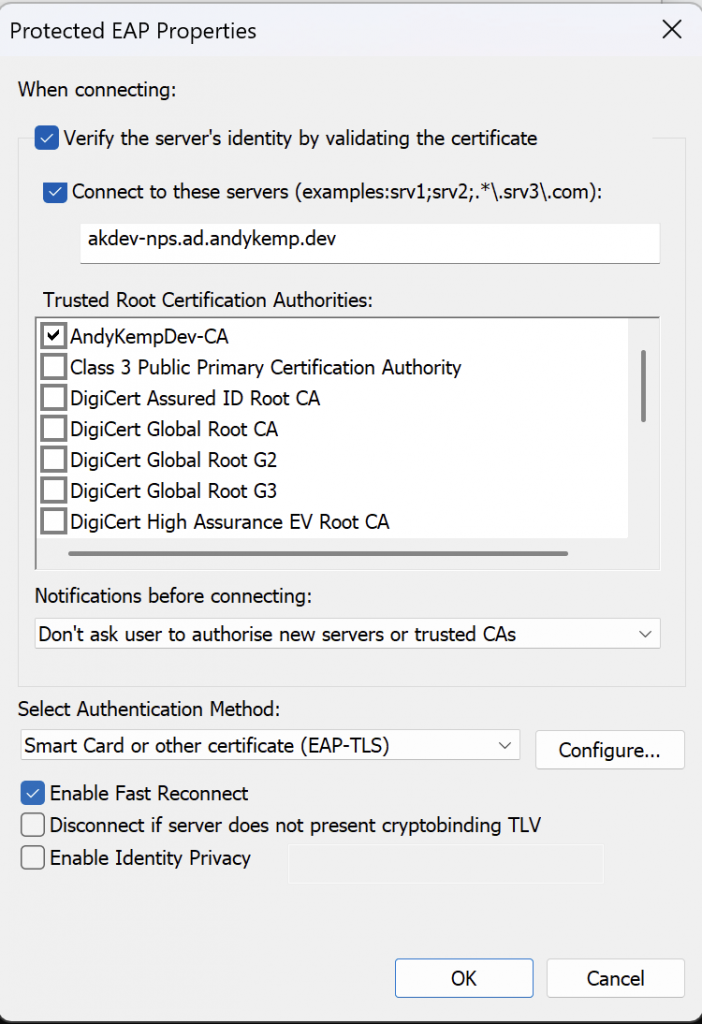
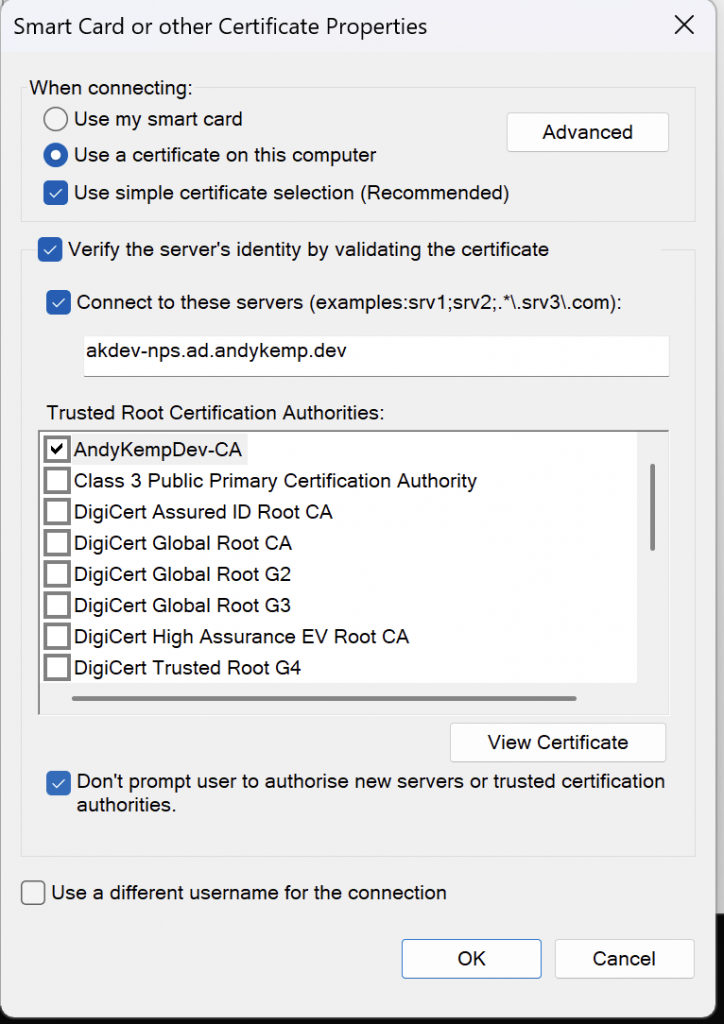
Then click on theConfigurenext to**Select Authentication Method:**and ensure it is set to the following:
When connecting: Ensure thatUser a certificate on this computeris selected EnsureUse simple certificate selection (Recommended)is enabled EnsureVerify the server’s identity by validating the certificateis enabled EnableConnect to these serversis set to he NPS server name Ensure that the Certificate Authority for the domain is selected Ensure thatDon’t prompt user to authorise new servers or trusted certificates authoritiesis enabled.
Once this is all set click onOKand thenOKagain and then finallyOKagain to close the properties.
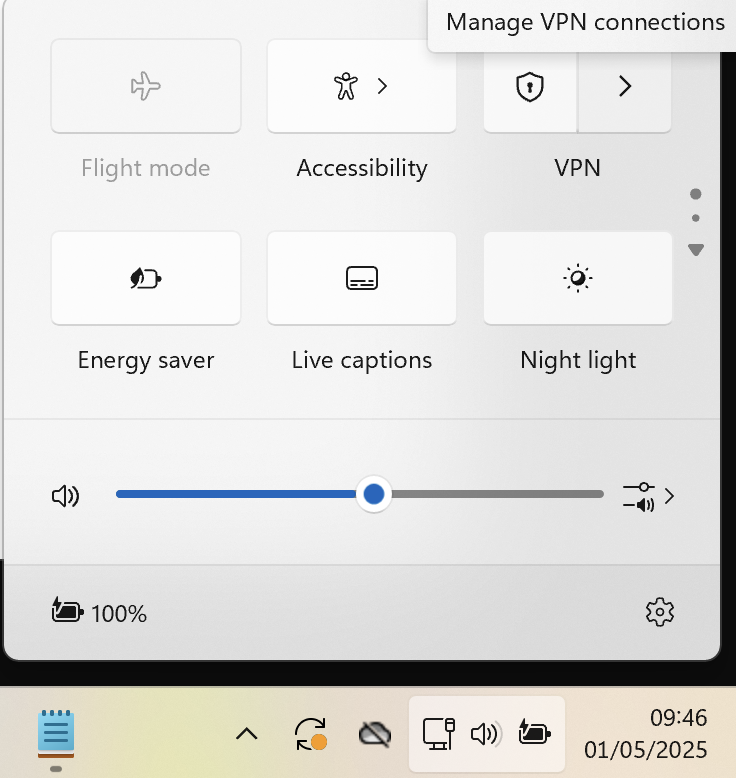
Now this is done you’re ready to connect. Click on theNetwork Connectionin the system tray and then selectVPN:
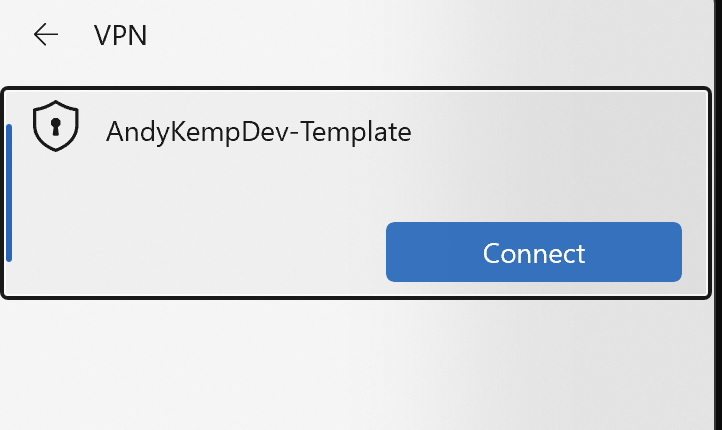
You’ll then be presented with the newly created VPN Connection. Click onConnect
it will then connect to the Always On VPN Infrastructure:
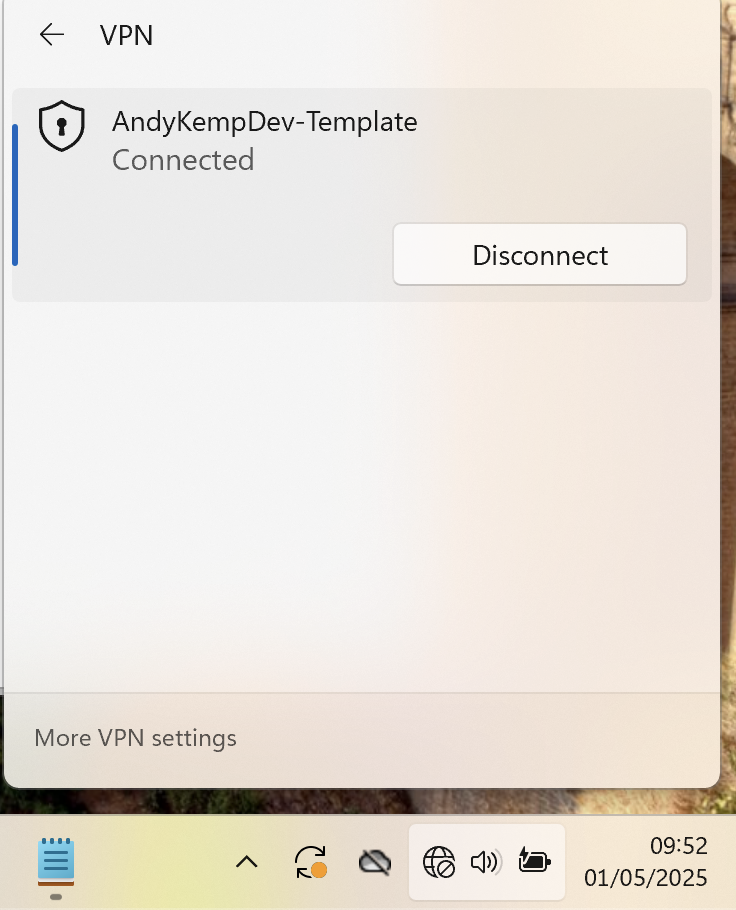
You will notice that the network connection then complains about no internet access, that is fine for now as this is the template.
Conclusion
You now have an up and running Always On VPN Infrastructure which includes the following:
5 Certificates, however at the moment you have only used 3 of them (VPN Server, NPS and the Domain Joined User) the other two will be covered off in the next part. You also have 2 servers configured your VPN Server running Routing and Remote Access and your Network Policy Server to provide the RADIUS Authentication. With this infrastructure you should be able to successfully connect from a client that is domain joined. If not then review what you have configured, more than often (in my case) it is a typo, or a miss configure of a certificate.
Comments
No comments yet — be the first to leave one below.